
How to Convert PNG to WebP on Windows Offline
Convert PNG images to WebP locally on Windows, compare lossy and lossless output, and inspect a measured conversion without uploading the source.
On this page
- Quick answer
- Why convert PNG to WebP?
- Before you start
- Step-by-step: convert PNG to WebP with LocalFlux
- What happened in the tested conversion?
- Lossy versus lossless WebP
- Common mistakes
- When should you keep PNG?
- Batch conversion without uploads
- Privacy and offline notes
- Troubleshooting
- Final checklist
- Publication evidence
- Practical checks before and after conversion
PNG is dependable, widely supported, and especially useful for graphics that need sharp edges or transparency. It is not always the most economical format for a website, app, or content library, though. When every kilobyte affects page weight, converting a PNG copy to WebP can reduce the transfer size while keeping the original PNG safely available.
The important word is copy. Converting a PNG to WebP should not mean renaming .png to .webp, and it should not mean deleting the source as soon as another file appears. A real conversion decodes the PNG pixels and writes a valid WebP file. You then check its dimensions, transparency, visual quality, and compatibility with the place where it will be used.
This guide shows that workflow in LocalFlux, a Windows converter that performs supported conversions on the PC. No browser upload is involved in normal conversion, and the route can run offline after the app has been installed.
Quick answer
To convert a PNG to WebP offline on Windows:
- Open LocalFlux and add the PNG file.
- Keep Convert selected.
- Choose WebP as the output format.
- Open Options if you need to resize the image or adjust supported quality controls.
- Select Convert 1 file.
- Open the resulting
.webpfile and compare it with the PNG before publishing it.
LocalFlux writes a new file with a safe output name and leaves the original PNG unchanged during normal conversion.
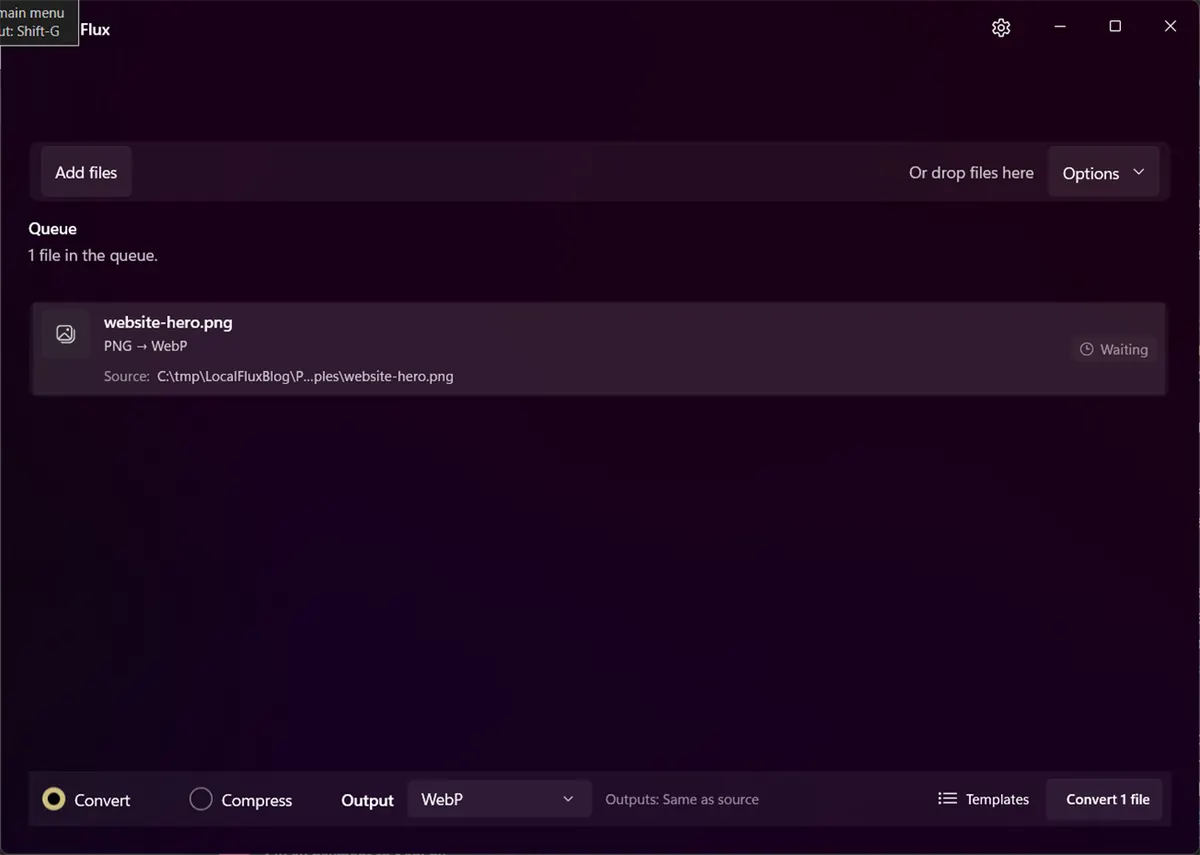
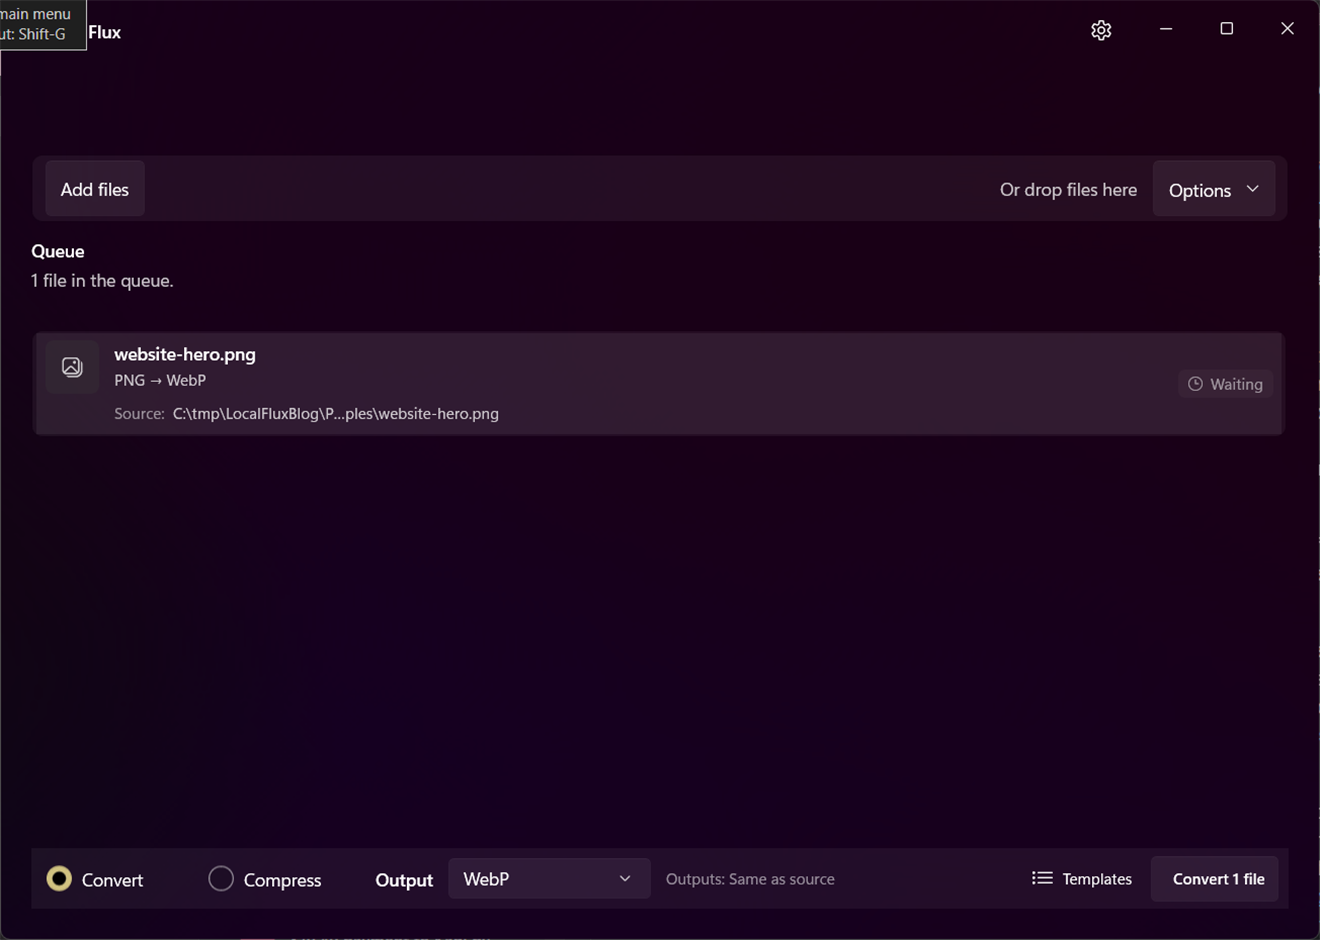
The tested PNG is queued for WebP output. The sample filename and path are synthetic and contain no personal information.
Why convert PNG to WebP?
PNG stores pixels losslessly and supports an alpha channel. That combination makes it an excellent choice for interface graphics, diagrams, logos, screenshots, and images whose transparent edges must remain exact. It can also create files that are larger than necessary for web delivery.
WebP supports both lossy and lossless image coding, transparency, metadata, and animation. Google describes lossless WebP as reconstructing pixel values exactly and reports smaller average files than PNG across its test corpus. Those figures are useful context, not a promise for every image. A tiny icon, an already optimized PNG, or an unusual color pattern may produce a smaller saving - or no useful saving at all. See Google’s WebP overview and lossless bitstream specification.
The practical reason to convert is therefore not “WebP is always better.” It is: the destination accepts WebP, and the tested WebP copy gives you a useful size or delivery advantage without an unacceptable visual change.
Before you start
Keep these four checks in mind:
- Confirm that the website, CMS, email platform, app framework, or document workflow accepts WebP.
- Keep the original PNG. It remains your compatibility fallback and, in many cases, your clean master.
- Know whether the PNG uses transparency. Transparent edges deserve a deliberate visual check after conversion.
- Decide whether you want a lossless or lossy result. LocalFlux exposes a practical quality control for supported image routes, but the published file still needs inspection.
For a batch, every compatible row uses the one selected output format. Split unrelated jobs into separate batches if they need different formats or settings.
Step-by-step: convert PNG to WebP with LocalFlux
1. Add the PNG
Open LocalFlux, choose Add files, and select the PNG. Drag and drop also works. On supported Windows 11 installations, a compatible file can also be handed to LocalFlux from File Explorer.
The queue should show the source name and a route such as PNG -> WebP. If the row is not ready, stop and read the message rather than forcing a different extension onto the file.
2. Choose WebP as the output
At the bottom of the window, keep Convert selected and choose WebP from the output list. LocalFlux supports explicit routes rather than pretending that every format can be converted into every other format.
The screenshot above shows the exact tested route. The source was a synthetic 96 x 64 PNG named website-hero.png.
3. Review size and quality options
Open Options when you need a smaller set of pixel dimensions or a different quality balance. Resizing and encoding quality solve different problems:
- Reducing width and height lowers the number of pixels. This can produce a large size reduction, but the image no longer has the same dimensions.
- Reducing quality changes how aggressively supported lossy encoding discards visual detail.
- A lossless WebP aims to preserve pixel values, but its file size is still content-dependent.
Do not shrink a 2x high-density asset to its displayed CSS size unless you are sure the design does not need the extra pixel density. Keep aspect ratio locked unless intentional stretching is part of the design.
4. Convert locally
Select Convert 1 file. LocalFlux uses its bundled image conversion component for this supported route. During normal conversion, the file is processed on the PC rather than sent to a browser converter service.
When the conversion completes, LocalFlux shows the output action and the new safe filename.
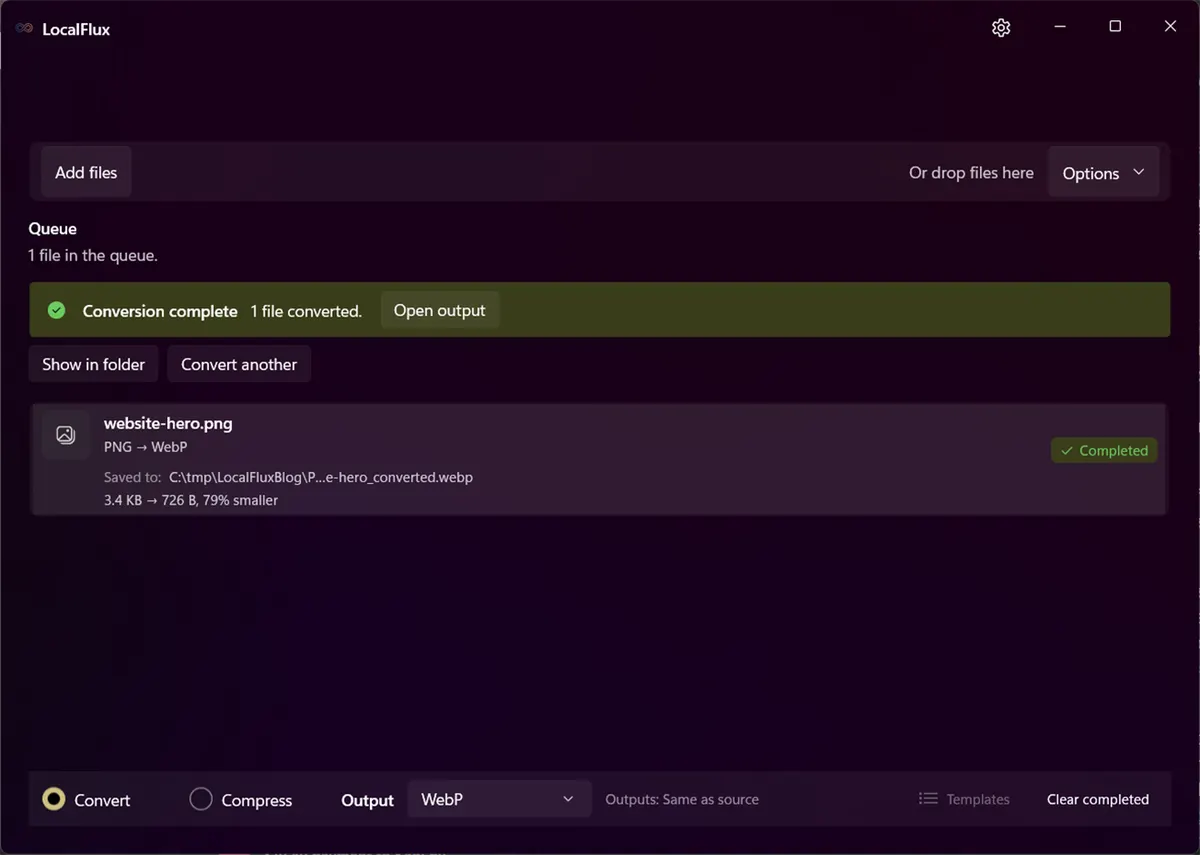
The completed route created website-hero_converted.webp next to the synthetic source.
5. Verify the WebP
Open the output in the browser or application that will actually use it. A generic image viewer is not enough when the final destination has its own image pipeline.
Check:
- pixel dimensions;
- transparent edges over both light and dark backgrounds;
- fine text and one-pixel lines;
- gradients for banding;
- color appearance;
- file size;
- any metadata your workflow requires;
- the real page or app at normal and high-density display sizes.
If the image is a website asset, also check the page with browser developer tools. Confirm the WebP is served with the correct MIME type (image/webp) and that a cache or CDN has not left the old PNG in place.
What happened in the tested conversion?
For this article, LocalFlux 1.0.7.0 converted an opaque synthetic PNG on Windows x64:
| Observation | PNG source | WebP output |
|---|---|---|
| Dimensions | 96 x 64 | 96 x 64 |
| File size | 3,465 bytes | 726 bytes |
| Size change | - | about 79% smaller |
| Output name | website-hero.png | website-hero_converted.webp |
This is a deliberately small, simple fixture. It proves the route and safe output behavior; it does not predict the saving for a photograph, screenshot, transparent logo, or already optimized production asset. Test your own image set and report a range rather than presenting one sample as a universal benchmark.
Lossy versus lossless WebP
The distinction matters because a .webp extension does not tell you whether the pixels were encoded losslessly.
Lossless WebP is the safer starting point for flat graphics, line art, UI elements, and cases where exact pixel reconstruction matters. It can still be smaller than PNG, but not for every source.
Lossy WebP is often effective for photographic or textured content. It may be much smaller, but repeated lossy conversions can accumulate artifacts. If a PNG was created from an earlier JPEG, converting it to lossy WebP does not restore detail that was already lost.
Transparency is supported by WebP, including combinations where RGB data is lossy and alpha is handled separately. Transparent pixels can contain hidden color values, so compare edge halos over different backgrounds. Google’s WebP compression overview explains the format’s lossy, lossless, alpha, metadata, and color-profile capabilities.
Common mistakes
Renaming the extension
Changing image.png to image.webp changes only the filename. The bytes remain PNG, and software that inspects the content may reject it. Use a real converter.
Deleting the PNG too early
WebP support is broad in modern browsers, but a specific editor, document system, ingest service, or older embedded device may still require PNG. Keep the master until the entire workflow is proven.
Judging only by file size
A 50% reduction is not a win if text looks soft, alpha edges acquire halos, or the content system recompresses the image again. Visual fitness comes first.
Assuming all PNGs are the same
A photographic PNG, a palette-based icon, a transparent interface element, and a screenshot behave differently under compression. Test representative assets from each class.
Treating metadata behavior as universal
PNG and WebP can carry different metadata structures. Do not assume every converter preserves or strips ICC, EXIF, XMP, or textual metadata. The route fixture used here was intentionally simple and does not establish metadata preservation.
When should you keep PNG?
Keep PNG when the destination explicitly requires it, when pixel-exact lossless behavior is more important than transfer size, or when your compatibility matrix is uncertain. PNG can also be the better working master even if a WebP derivative is delivered to users.
For websites, a common pattern is to retain a PNG source in the asset pipeline and publish a tested WebP derivative. Whether you need a fallback depends on the browsers, embedded webviews, crawlers, email clients, and third-party tools in your actual audience.
Batch conversion without uploads
If you have many PNG files, add them together, choose WebP once, review the rows, and convert the compatible batch. Batch processing is most useful when the files share the same destination requirements and quality policy.
Use a representative review sample before converting a large library. Check one flat graphic, one screenshot, one transparent asset, and one photographic image. When those pass, process the rest and keep a manifest so the WebP copies can be traced back to their originals.
Privacy and offline notes
Local processing avoids handing an image to an unknown upload service during normal conversion. That is useful for unpublished designs, internal screenshots, client assets, and images that may contain embedded metadata.
Offline conversion does not make the output automatically private. A converted image can still contain visible information or metadata, and uploading the final WebP later is still an upload. Review both the pixels and metadata according to your publishing policy.
LocalFlux does not require sign-in for conversion, creates a new output copy, and can run this supported route offline after installation. It is a converter, not a full image editor or digital-asset-management system.
Troubleshooting
The output is not smaller. The PNG may already be optimized, the content may not compress well with the selected WebP mode, or the settings may prioritize quality. Compare lossless and carefully chosen lossy output, but do not lower quality blindly.
Transparency looks wrong. Test over contrasting backgrounds, confirm the source really has alpha, and avoid treating the opaque fixture in this article as proof for transparent assets.
The website still loads the PNG. Check the HTML/CSS reference, build pipeline, service worker, CDN, and browser cache. A successful local conversion does not update your site automatically.
The file will not open in a target app. Keep the PNG and verify that app’s WebP support. Browser support does not guarantee support in every Windows desktop program.
Final checklist
- The output is a real WebP, not a renamed PNG.
- Dimensions match the intended display density.
- Transparency and edge color were checked where relevant.
- The production destination accepts WebP.
- The visual result was compared at 100% and in context.
- The file-size saving is useful for this asset.
- The original PNG is retained.
If you convert supported image assets regularly and want a graphical, local workflow, get LocalFlux from the Microsoft Store. For a single public image, a reputable command-line encoder may also be reasonable. The right choice is the one that gives you a verified output while preserving the master.
Publication evidence
The files used in this article are synthetic and privacy-reviewed. You can inspect the published source and converted output in the sample folder, along with the test record and SHA-256 media manifest:
Practical checks before and after conversion
The reliable workflow is to decide between lossy and lossless WebP; inspect transparency, thin edges, text, color profile behavior, and the actual delivery-size saving. This matters because changing a file extension does not preserve every property of the source. Decide what the destination actually needs, keep the source as the master, and use a small representative file before processing a large batch.
Before you start
- Record the source format and the properties that matter to the destination.
- Choose settings for the intended viewer, editor, device, or upload system.
- Use a new output folder and keep collision-safe names.
- Open the result in the software that will actually receive it.
- Compare content, dimensions or duration, and any metadata you expected to keep or remove.
Review the output
A successful status only confirms that an output was written. It does not prove that every font, frame, channel, page, formula, profile, tag, or accessibility feature survived. For important work, inspect representative outputs and retain the original until the delivered copy has been accepted.
A successful status only confirms that an output was written. It does not prove that every font, frame, channel, page, formula, profile, tag, or accessibility feature survived. For important work, inspect representative outputs and retain the original until the delivered copy has been accepted.
The reliable workflow is to decide between lossy and lossless WebP; inspect transparency, thin edges, text, color profile behavior, and the actual delivery-size saving. This matters because changing a file extension does not preserve every property of the source. Decide what the destination actually needs, keep the source as the master, and use a small representative file before processing a large batch.