
How to Convert WMA to MP3 Offline on Windows
On this page
- Why make an MP3 copy?
- What this guide tested—and what it did not
- Step-by-step WMA-to-MP3 conversion
- Measured results
- Does WMA-to-MP3 conversion lose quality?
- Metadata: titles, artists, dates, and private context
- Common problems
- Batch-conversion strategy
- Privacy and offline processing
- Final checklist
- The practical takeaway
- Publication evidence
- Practical checks before and after conversion
WMA audio is common in older Windows music libraries, voice archives, meeting exports, and recordings created by legacy software. Modern players may still open it, but MP3 is accepted by a wider range of phones, car stereos, editing tools, websites, and embedded systems.
LocalFlux converts WMA to MP3 locally on Windows 11. Add the files, choose MP3, and run the queue. The source .wma files stay unchanged and new _converted.mp3 copies are written beside them. Because the conversion happens on the computer, a private recording does not need to pass through an online converter.
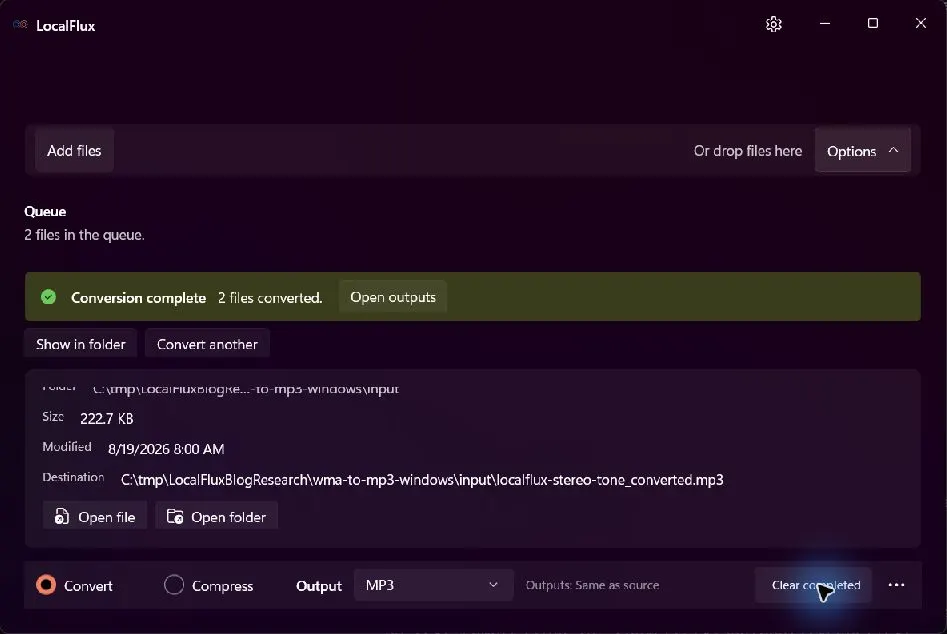
The tested LocalFlux 1.0.8 job converted one mono and one stereo WMA2 fixture. The size reductions shown are examples, not guarantees.
Quick steps: open LocalFlux, add the WMA files, keep Convert selected, choose MP3, begin with the default compression setting, convert, then listen to every output before moving or deleting anything.
Why make an MP3 copy?
WMA stands for Windows Media Audio, but “WMA” can refer to a family of codecs carried in an ASF container. MP3 is another lossy audio codec with extremely broad playback support. Conversion is useful when the destination rejects the WMA codec or container.
Good reasons include:
- moving an archive to a phone, car, portable player, or non-Windows system;
- importing audio into software that accepts MP3 but not WMA;
- delivering recordings through a form or learning platform with an MP3 requirement;
- standardizing a mixed legacy collection while retaining the originals.
Do not convert only to make the extension look modern. If every destination already plays the WMA and you are preserving an archive, the source is the best master. MP3 should usually be a compatibility copy.
What this guide tested—and what it did not
The test used the packaged x64 LocalFlux 1.0.8.0 build on Windows 11 and two synthetic WMA2 inputs:
- a 9-second mono file at 44.1 kHz;
- a 12-second stereo file at 48 kHz.
Both converted to MP3 and kept their channel counts and sample rates. This does not establish support for every file with a .wma extension. WMA Lossless, WMA Voice, protected DRM files, damaged ASF containers, and unusual professional encodings were not part of the test.
If a file is valuable, identify its codec and confirm that it plays correctly before batch conversion.
Step-by-step WMA-to-MP3 conversion
1. Prepare a working copy
The tested files were stored under:
C:\tmp\LocalFluxBlogResearch\wma-to-mp3-windows\inputA neutral local folder makes the process easier to document and avoids exposing a username or client name in captures. LocalFlux preserves the source, but a separate working copy adds protection against human error elsewhere in the workflow.
Before starting, listen to each WMA and note:
- the expected duration;
- whether it is mono or stereo;
- whether the beginning and ending are intact;
- whether it contains speech, music, silence, or several distinct sections;
- any title/artist information that must be preserved or removed.
2. Add the WMA files
Open LocalFlux and use Browse files, or drag the files into the intake area. A batch is useful when all files need the same output and quality policy.
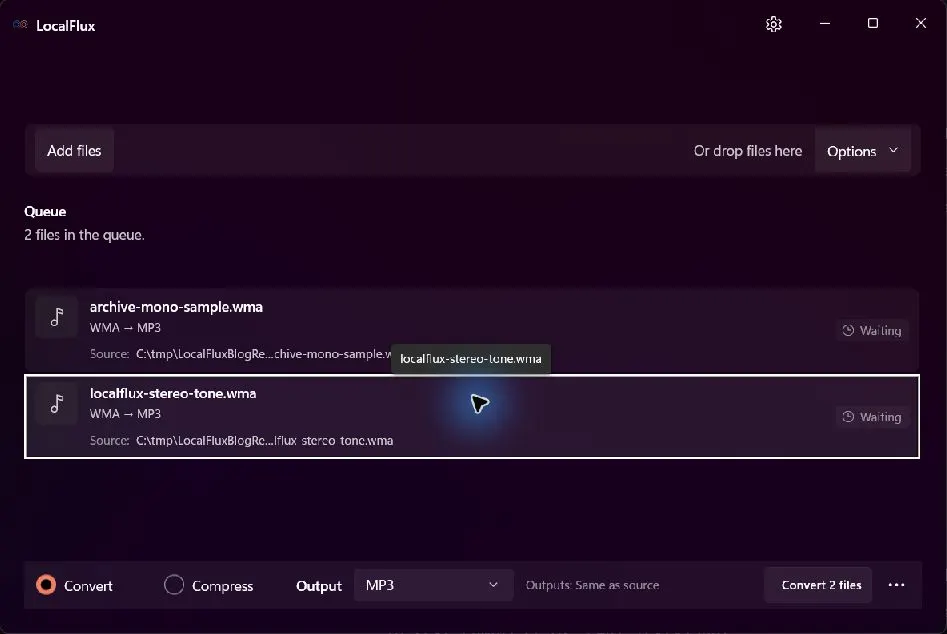
The queue shows WMA → MP3 for both synthetic fixtures and uses only a neutral C:\tmp path.
Make sure every row shows the expected route. If the batch mixes incompatible sources, separate them so a failure is easier to diagnose.
3. Review privacy and conversion options
Expand Options. Local conversion already avoids an upload, but the Share safely setting addresses embedded metadata and is separate from ordinary conversion.
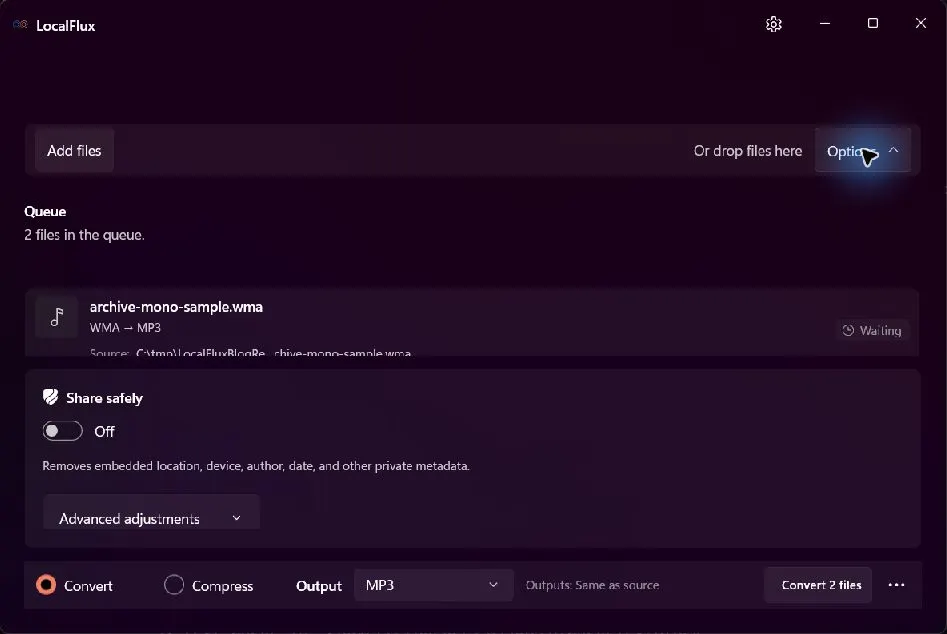
Share safely is off in the ordinary conversion test, so metadata removal should not be assumed.
Use ordinary conversion when you want the normal compatible copy and have reviewed the metadata requirements. Consider Share safely when a file is leaving your control, then inspect the result. It cannot remove private information spoken in the recording or encoded in the audible content.
Open Advanced adjustments to review compression. The test used Default.
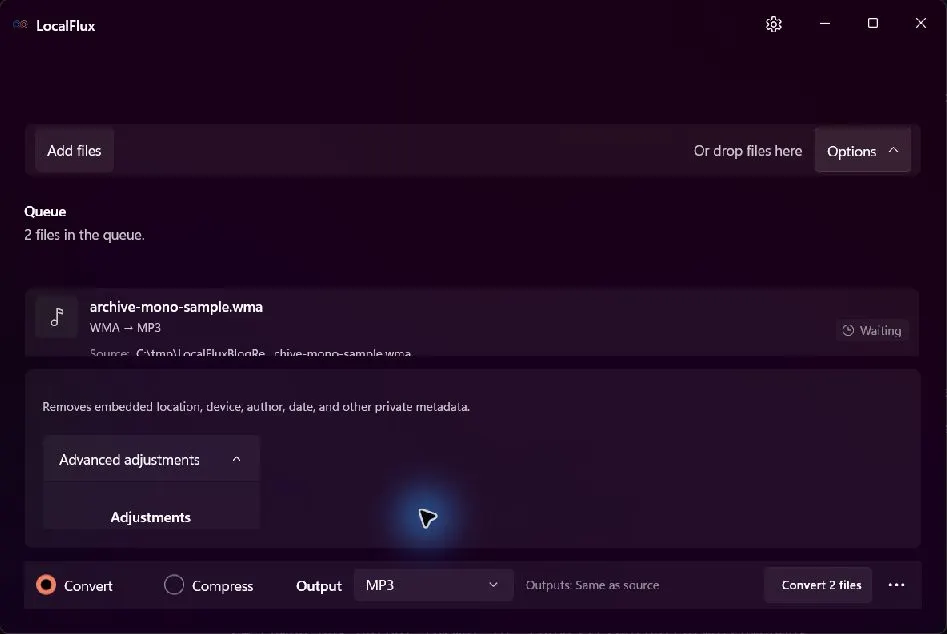
The first pass kept the default compression setting. Change one variable at a time if a second pass is needed.
4. Convert the batch
Select Convert 2 files. Short synthetic audio can finish quickly; long recordings and large batches take longer. Do not rename or move files while the queue is active.
After completion, LocalFlux lists the destination path and the observed byte-size change. These numbers are useful for review but do not measure sound quality.
5. Listen to the outputs
For every MP3, check:
- the first and last ten seconds;
- quiet speech and loud passages;
- any channel-specific audio;
- clicks, gaps, or unexpected silence;
- duration against the source;
- playback in the actual destination device or application.
For spoken archives, intelligibility is the key test. For music, listen for high-frequency smearing, pre-echo around percussion, and stereo-image changes. Headphones can reveal issues that laptop speakers hide.
Measured results
| Source | Input details | MP3 output | Duration: source → output | Size: source → output |
|---|---|---|---|---|
archive-mono-sample.wma | WMA2, mono, 44.1 kHz | MP3, mono, 44.1 kHz | 8.999 s → 8.963 s | 125,644 B → 72,418 B |
localflux-stereo-tone.wma | WMA2, stereo, 48 kHz | MP3, stereo, 48 kHz | 12.001 s → 11.989 s | 228,044 B → 192,715 B |
LocalFlux reported the MP3 files as 42% and 15% smaller for these inputs. The difference between the two results is a reminder that an extension does not determine the compression opportunity. Source bitrate, content, duration, encoder delay, and output settings all contribute.
The small reported duration differences are consistent with audio framing and encoder delay in these fixtures. They are not a reason to skip listening tests, especially for files that must align with video, captions, transcripts, or timestamps.
Does WMA-to-MP3 conversion lose quality?
For the tested WMA2 files, yes in the technical sense: lossy WMA audio was decoded and encoded again as lossy MP3. The output cannot recover information the WMA encoder already removed, and the MP3 encode can remove more.
You can reduce avoidable damage by:
- using the original WMA as the source rather than a previously converted copy;
- starting at the default compression setting;
- avoiding repeated MP3-to-MP3 conversions;
- keeping mono recordings mono unless a destination requires stereo;
- retaining the original sample rate unless there is a clear need to change it;
- keeping the WMA master after delivery.
For irreplaceable audio preservation, store a lossless archival copy as well. MP3 is a delivery format, not an ideal preservation master.
Metadata: titles, artists, dates, and private context
Audio metadata can include title, artist, album, genre, comments, creation software, dates, and cover art. A filename can also reveal a person, project, or meeting even when tags are empty.
Decide what the recipient needs. A personal music library may benefit from accurate artist and album tags. A research interview or internal meeting may require metadata minimization. Share safely is a useful control, but verify the actual output with a metadata inspector and remember that spoken content remains.
The test fixtures used neutral tags and synthetic tones. Screenshots show only archive-mono-sample.wma, localflux-stereo-tone.wma, and a C:\tmp path.
Common problems
LocalFlux rejects the WMA
The extension does not identify the exact codec. Confirm the file plays, check whether it is DRM-protected, and identify the stream. The route tested here was WMA2, not every WMA-family codec.
Try copying the file to a simple local folder and processing it alone. If it still fails, keep the error details and use a tool that explicitly supports that codec.
The MP3 is silent or missing a channel
Listen to the source first. Then compare channel count and test another player. Mono output from a mono input is expected; it should not be mistaken for a missing stereo channel.
The output is not much smaller
That can be normal. Conversion is primarily for compatibility. If size is also a requirement, try a moderately stronger compression setting on a copy and conduct an A/B listening test. Do not chase the smallest file without an intelligibility or quality threshold.
Speech sounds metallic or music loses detail
Return to the default or a higher-quality setting. Low-bitrate MP3 is more obvious on complex music, reverberant rooms, cymbals, and noisy recordings. For a voice-only destination, a controlled listening test may justify stronger compression; for music, be more conservative.
Duration does not match exactly
Compressed audio formats can report small timing differences because of frame boundaries and encoder delay. For standalone listening, a tiny difference may be harmless. For synchronization workflows, compare waveforms and use a format/tool designed for sample-accurate interchange.
Batch-conversion strategy
Group files with similar requirements. Do not mix a mono voice archive, a stereo music master, and a timing-critical production asset under one unexamined quality decision.
A practical sequence is:
- run one representative file;
- validate it in the destination;
- convert a small batch;
- review durations, channels, and several listening samples;
- convert the remainder;
- retain a manifest connecting source and output names.
LocalFlux’s _converted.mp3 naming makes source/output pairs easy to recognize, but a manifest or checksum list is valuable for a large archive.
Privacy and offline processing
An online converter may receive the full audio, filename, network metadata, and timing information. Local processing avoids that transfer. It is especially appropriate for interviews, internal calls, drafts, legal recordings, and audio containing personal information.
Still, protect local copies. Use suitable Windows permissions and storage encryption, avoid consumer sync folders when policy forbids them, and clean up temporary outputs according to your retention plan. An MP3 can be easier to play and share than the WMA, which increases the importance of access control.
Final checklist
Before conversion:
- confirm the WMA plays and identify important codec variants;
- keep a backup or working copy;
- decide whether metadata should be kept or removed;
- choose a representative file for the first test.
After conversion:
- verify duration, sample rate, channel count, and destination compatibility;
- listen to the beginning, middle, end, and the most demanding passage;
- inspect metadata and filenames;
- keep the WMA master until the entire workflow is accepted.
The practical takeaway
For the WMA2 files tested here, LocalFlux produced compatible MP3 copies locally, retained mono/stereo channel layouts and sample rates, and left the original files intact. The process is simple, but the acceptance test is auditory: play the results where they will actually be used.
Treat MP3 as a delivery copy, use conservative settings for the first pass, and preserve the WMA or another lossless master. See LocalFlux’s supported routes or compare the workflow with the M4A-to-MP3 guide.
Publication evidence
This guide uses synthetic audio fixtures tested with LocalFlux 1.0.8.0 x64 on Windows 11. The WMA sources, MP3 outputs, measurements, package details, and privacy review are retained with the article:
- Test record
- Measurements
- Privacy and rights review
- Media manifest with SHA-256 hashes
- Source and fixture notes
Practical checks before and after conversion
The reliable workflow is to identify protected or unusual WMA inputs; compare duration, channels, sample rate, tags, and audible transitions while avoiding needless bitrate inflation. This matters because changing a file extension does not preserve every property of the source. Decide what the destination actually needs, keep the source as the master, and use a small representative file before processing a large batch.
Before you start
- Record the source format and the properties that matter to the destination.
- Choose settings for the intended viewer, editor, device, or upload system.
- Use a new output folder and keep collision-safe names.
- Open the result in the software that will actually receive it.
- Compare content, dimensions or duration, and any metadata you expected to keep or remove.
Review the output
A successful status only confirms that an output was written. It does not prove that every font, frame, channel, page, formula, profile, tag, or accessibility feature survived. For important work, inspect representative outputs and retain the original until the delivered copy has been accepted.