
How to Batch Compress Images on Windows Without Uploading Them
Compress JPG, PNG, and WebP images together on Windows without uploading them, with a measured 12-file LocalFlux test, screenshots, video, and exact results.
On this page
- The short version
- Why a local batch workflow is different
- What I tested
- Step 1: assemble the batch
- Step 2: check the queue before starting
- Step 3: choose Balanced for a sensible first pass
- Step 4: run the batch
- Step 5: review the batch summary
- Inspect the evidence
- What “Already optimized” means
- Were the originals preserved?
- Mixed formats in Compress mode and the real one-format limitation
- Watch the 15-second workflow
- How to judge a batch before making it routine
- Practical patterns for recurring work
- Common questions
- A repeatable no-upload checklist
- The result
- Practical checks before and after conversion
If you resize product photos every week, prepare screenshots for a client portal, or keep a growing folder of web assets, compressing one image at a time quickly becomes the wrong workflow. The useful question is not whether one photo can be made smaller. It is whether a mixed batch can be processed consistently, privately, and without making you babysit every file.
LocalFlux runs that job on your Windows PC. You add the images once, choose a compression outcome once, and let the queue work through them without sending the source files to an upload form.
For this guide, I tested the live LocalFlux 1.0.7.0 app with 12 rights-cleared synthetic images: four JPGs, four PNGs, and four WebPs. The files began at 7,424,843 bytes in total and finished at 4,123,560 bytes using the Balanced preset. That is 3,301,283 bytes saved, or 44.5% across the batch. Eleven files became smaller. One deliberately pre-optimized PNG was reported as Already optimized and was copied byte for byte.
Measured example, not a promise: compression depends on image content, dimensions, source format, and previous encoding. Photographs, flat graphics, screenshots, and already-optimized downloads can respond very differently to the same preset.
Get LocalFlux from the Microsoft Store
The short version
To batch compress images locally on Windows:
- Open LocalFlux and select Compress.
- Add several supported JPG, PNG, or WebP files. You can use Add files or drag them into the window.
- Open Options and choose a preset. Balanced is the practical starting point for a recurring mixed batch.
- Leave Output set to Same as source unless you have a reason to choose another folder.
- Select Compress 12 files (the number changes with your queue).
- Review the batch summary and individual results before using or publishing the new copies.
LocalFlux creates new files with _compressed in the name. It does not replace the originals in this workflow.
Why a local batch workflow is different
Online image compressors often make the first file feel easy: choose a file, wait for an upload, download the result, then repeat. A recurring batch exposes the friction hidden in that sequence. You must decide whether the service accepts the format, how many files it allows, how long the upload will take, where the download went, and what its retention policy means for your files.
A local batch changes the shape of the job. The source files are read from your disk, the encoders run on your computer, and the outputs are written back to a folder you control. There is no upload step in the conversion path, so network speed does not determine how quickly a large batch reaches the encoder.
That is especially useful for routine work:
- a freelancer preparing client screenshots every Friday;
- a shop owner reducing a folder of product photos;
- a developer checking UI assets before a release;
- a marketer building weekly campaign variants; or
- anyone processing images that should not be handed to an arbitrary web form.
Local processing is not a substitute for backups, access control, or careful file naming. It simply removes the upload from this particular operation.
What I tested
The test set contains 12 synthetic images rather than personal photographs or customer material. It mixes photographic detail with flat graphics so the batch behaves more like real recurring work than a folder of near-identical files.

| Group | Files | Typical content | Why it is useful |
|---|---|---|---|
| JPG | 4 | garden, fabric, night street, workspace | Detailed photographic content often has meaningful lossy-compression headroom. |
| PNG | 4 | small icon, dashboard card, gradient poster, line diagram | Flat graphics test lossless optimization, transparency-friendly workflows, and already-optimized inputs. |
| WebP | 4 | abstract texture, architecture, food, product still | Modern web assets show how an already-efficient format behaves in the same queue. |
The four formats are not converted into one common type in Compress mode. Each JPG remains JPG, each PNG remains PNG, and each WebP remains WebP. That distinction matters, and it is easy to confuse it with LocalFlux’s separate Convert mode.
Step 1: assemble the batch
Put the files you want to process in a folder you can identify easily. The test shown here uses the neutral path C:\tmp\LocalFlux-batch-compress-inputs, so the screenshots do not expose a personal username or project location.
Open LocalFlux, switch to Compress, and choose Add files. In the Windows picker, select the images you need. You can also drag several selected files from File Explorer into the app.
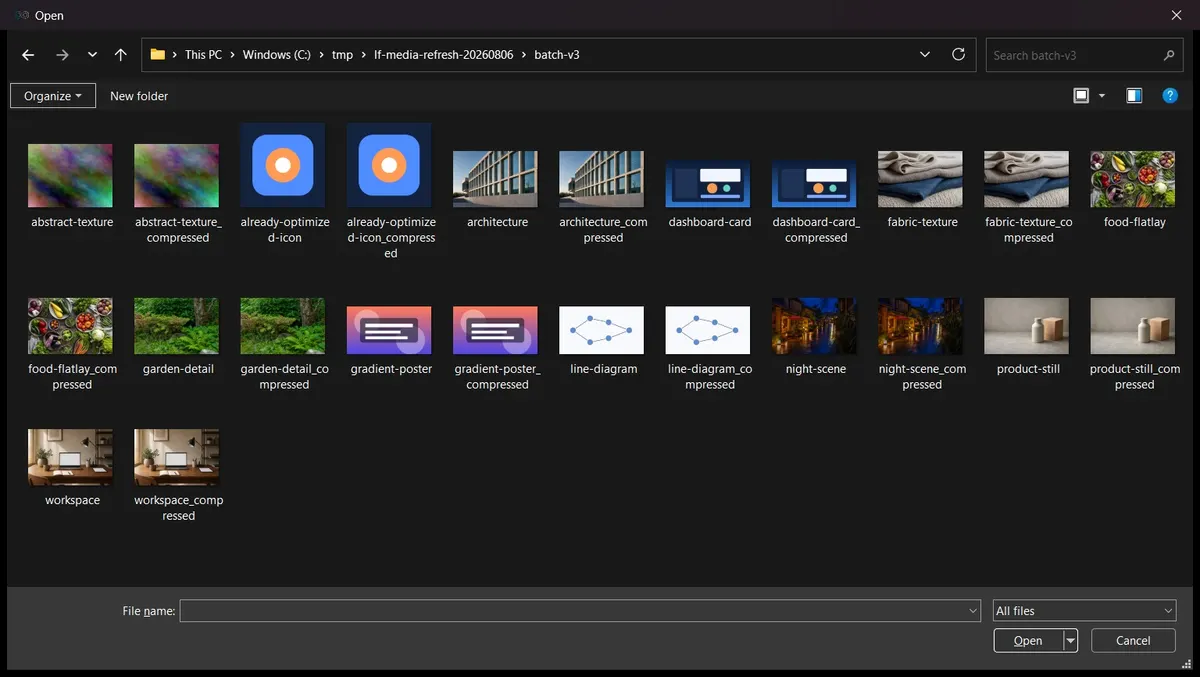
For a first run, use 10 to 20 representative files rather than thousands. A smaller sample tells you whether the output quality, format behavior, and size savings suit the destination before you commit to the whole archive.
Step 2: check the queue before starting
Once the files are added, LocalFlux shows the number in the queue and the operation for the selected item. The bottom bar should say Compress, and the output summary should say Same as source if you want the new files beside the originals.
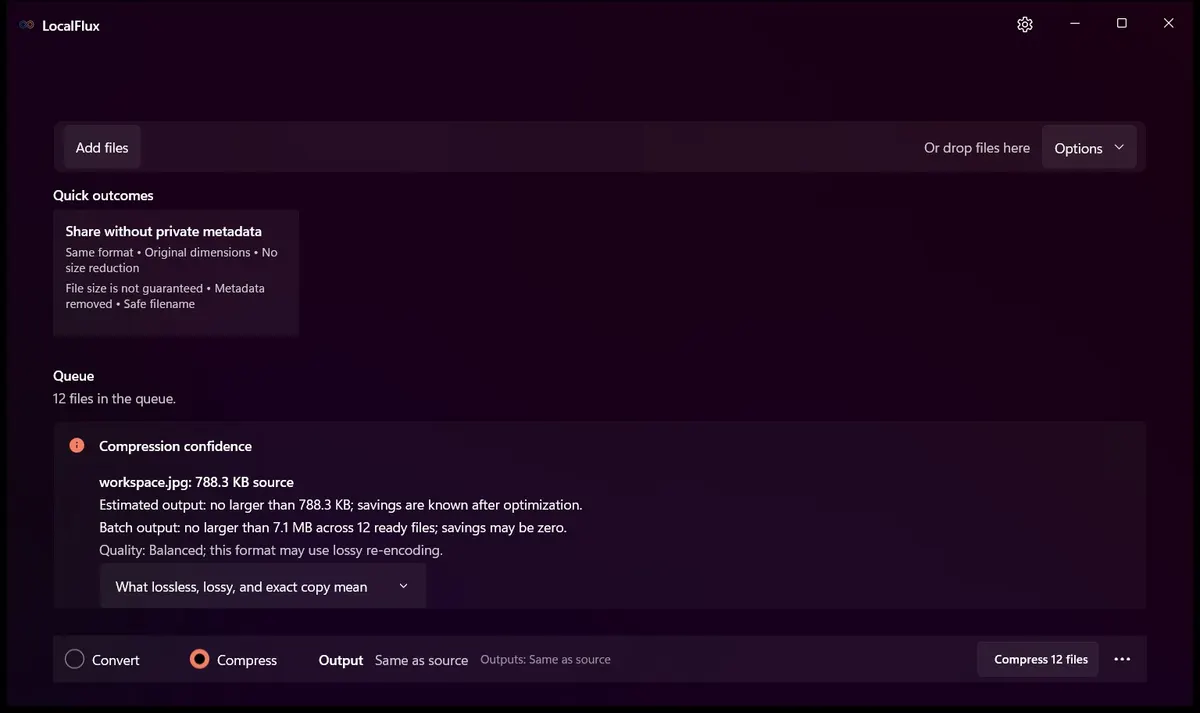
This is the point to catch accidental files. Check the queue count, inspect a few names, and confirm you are in Compress rather than Convert. If you add a file by mistake, remove it before starting instead of sorting it out afterward.
The visible selected item in the screenshot is a JPG, but the queue also contains PNG and WebP files. The action label changes per item, such as Compress JPG or Compress PNG, because Compress mode preserves each supported source format.
Step 3: choose Balanced for a sensible first pass
Open Options, select the Preset tab, and choose Balanced (recommended).
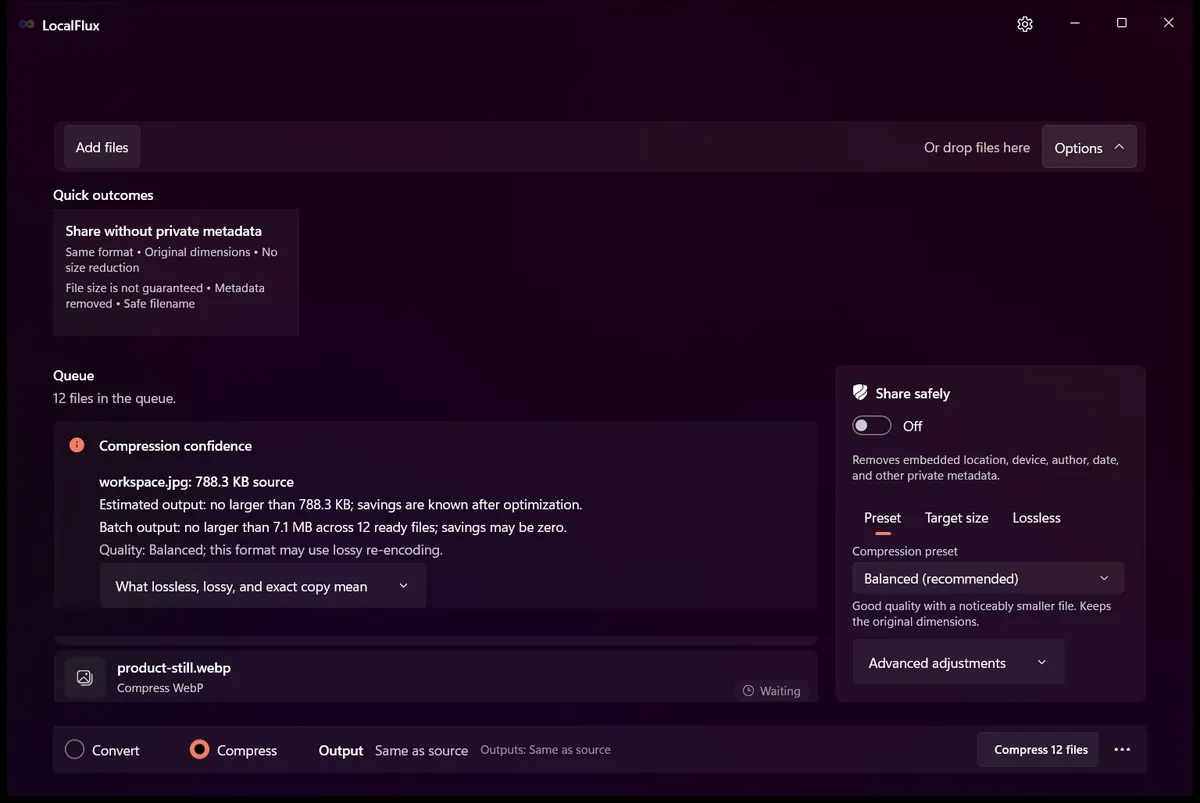
Balanced is a useful baseline because it aims for a noticeable reduction without treating the smallest possible file as the only objective. The app keeps the original dimensions for this preset. You should still inspect the results: a preset is a repeatable policy, not a guarantee that every kind of image will look identical after encoding.
Other jobs may call for a different outcome. A high-value portfolio image may deserve a quality-first setting. A temporary preview may justify a smaller file. A strict form limit is better handled with LocalFlux’s target-size controls rather than guessing which preset will land below the ceiling.
For a mixed recurring batch, start with Balanced, review several difficult files, and only then turn the setting into your routine.
Step 4: run the batch
Select Compress 12 files. LocalFlux disables controls that would make the active queue ambiguous and reports progress as files complete.
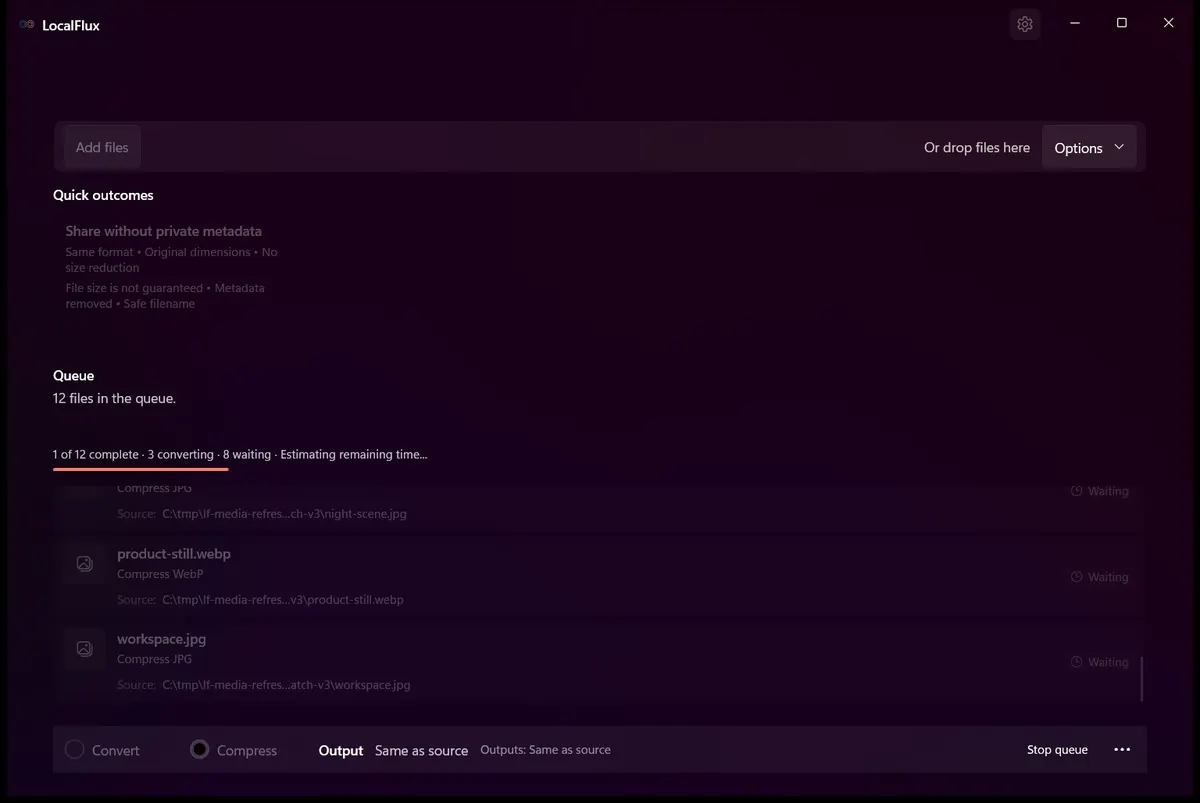
The progress capture is evidence of state, not a speed benchmark. Conversion time depends on the processor, storage, image dimensions, formats, and the amount of work each encoder performs. More importantly, a local workflow is predictable: the job does not wait for every source to travel to a remote server and every result to travel back.
Do not move or rename the sources while the batch is running. Let the queue reach a terminal state, then review failures or special results individually.
Step 5: review the batch summary
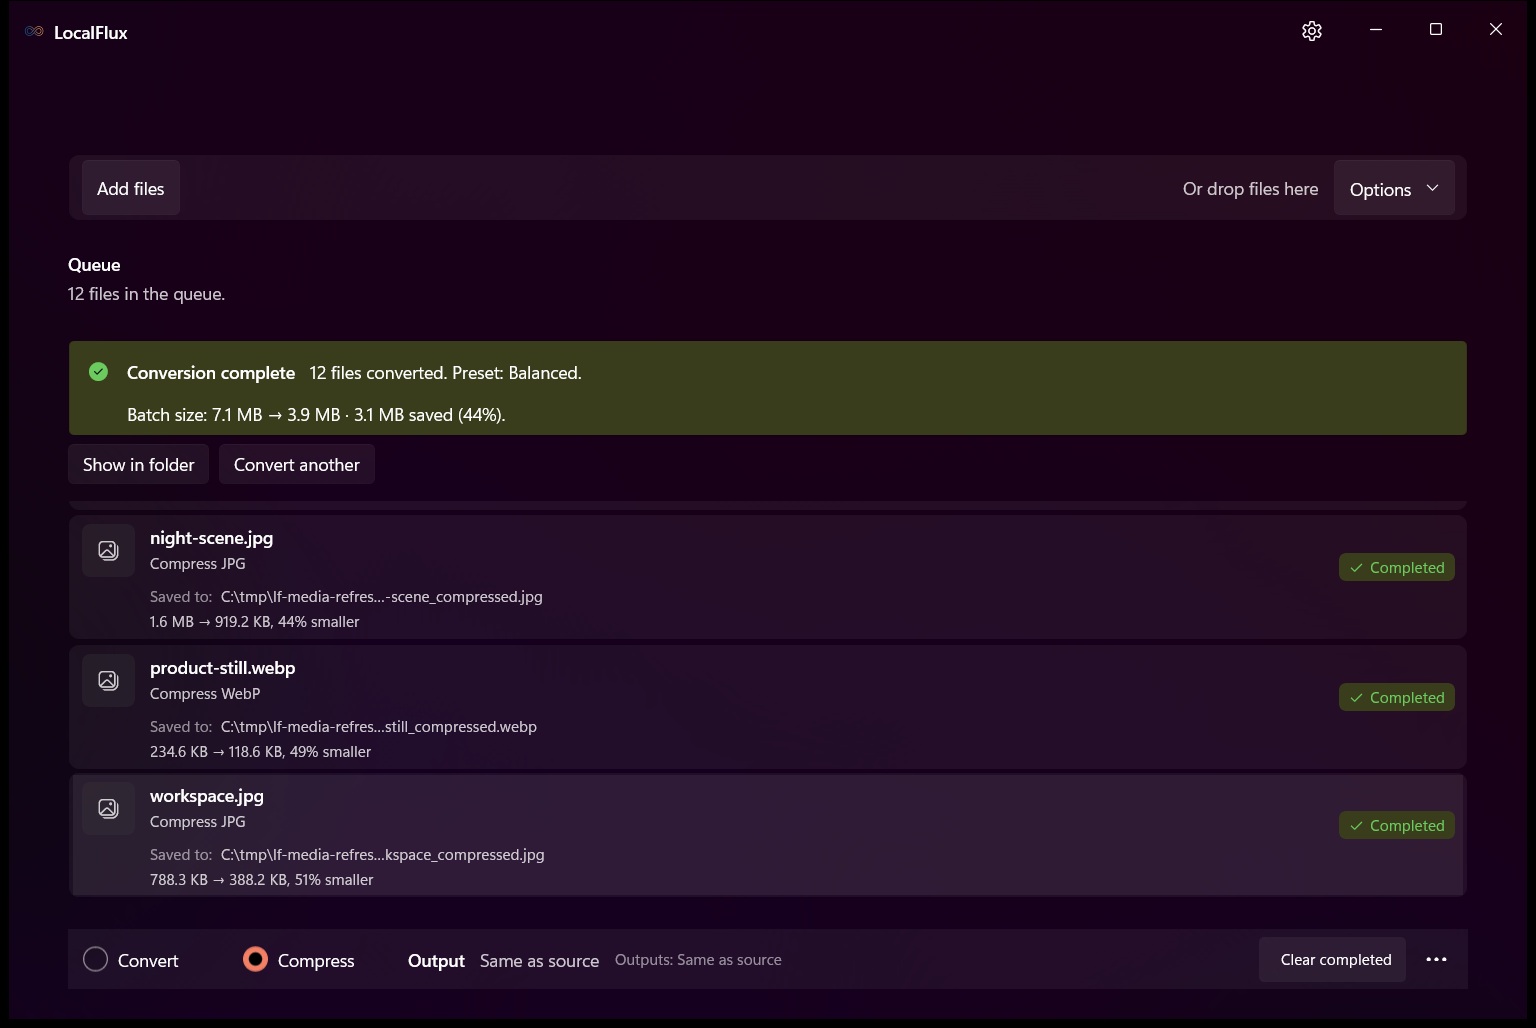
When the queue finishes, LocalFlux shows a completion banner and keeps the per-file results available.
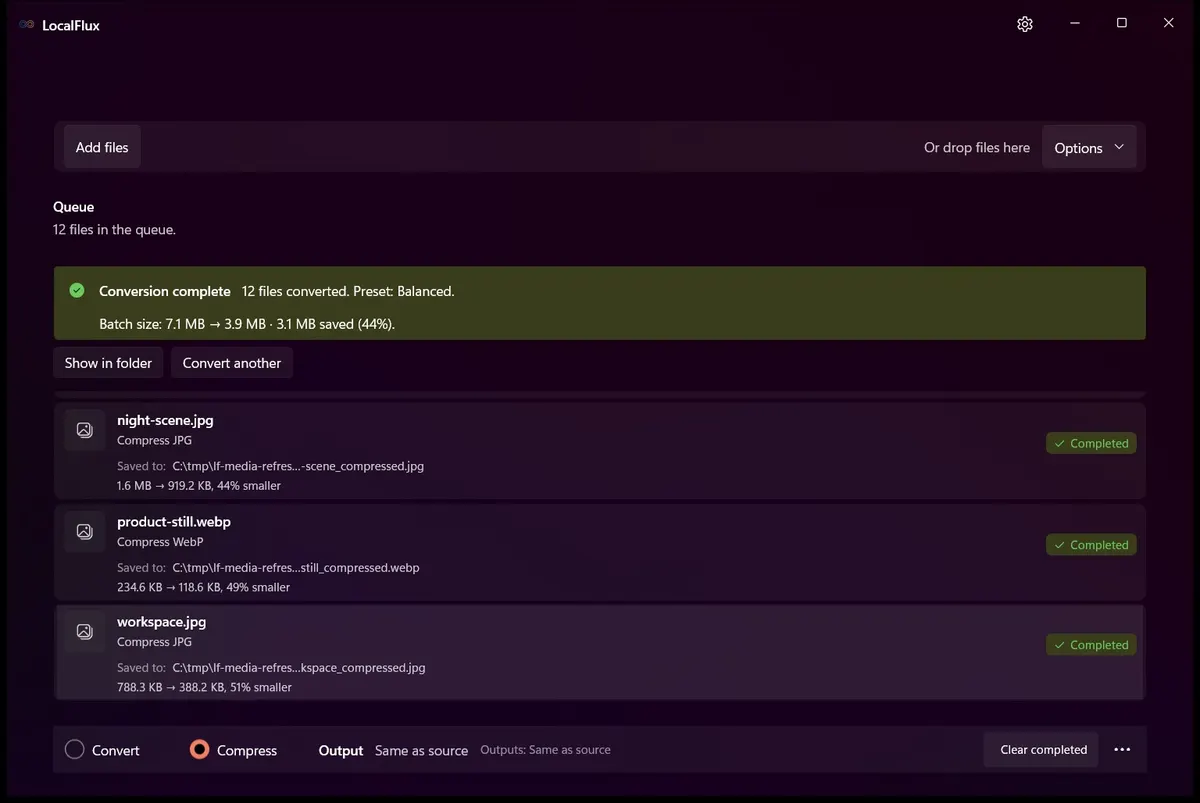
The test completed all 12 files. Exact byte measurements taken from the resulting files were:
| File | Format | Before | After | Saved |
|---|---|---|---|---|
| abstract-texture.webp | WebP | 486,866 B | 138,350 B | 71.6% |
| already-optimized-icon.png | PNG | 8,290 B | 8,290 B | 0.0% |
| architecture.webp | WebP | 247,578 B | 130,070 B | 47.5% |
| dashboard-card.png | PNG | 57,754 B | 56,001 B | 3.0% |
| fabric-texture.jpg | JPG | 1,314,907 B | 729,599 B | 44.5% |
| food-flatlay.webp | WebP | 711,582 B | 422,022 B | 40.7% |
| garden-detail.jpg | JPG | 1,670,620 B | 980,631 B | 41.3% |
| gradient-poster.png | PNG | 87,858 B | 84,957 B | 3.3% |
| line-diagram.png | PNG | 115,613 B | 113,373 B | 1.9% |
| night-scene.jpg | JPG | 1,676,322 B | 941,291 B | 43.8% |
| product-still.webp | WebP | 240,258 B | 121,482 B | 49.4% |
| workspace.jpg | JPG | 807,195 B | 397,494 B | 50.8% |
| Total | 12 files | 7,424,843 B | 4,123,560 B | 44.5% |
The aggregate reduction is useful for storage planning, but the per-file rows are more instructive. The photographic JPGs saved roughly 41% to 51%. The three flat, larger PNG graphics saved only about 2% to 3%. One WebP texture saved more than 70%, while another WebP saved about 41%.
There is no contradiction. “Balanced” is the policy; the pixels and previous encoding determine how much headroom remains.
Inspect the evidence
- Test record
- Per-file CSV with SHA-256 values
- Synthetic fixture prompts
- Prepared already-optimized PNG source
- Byte-identical LocalFlux output


What “Already optimized” means
The small PNG icon was intentionally optimized before the batch. LocalFlux reported 8.1 KB → 8.1 KB · Already optimized.
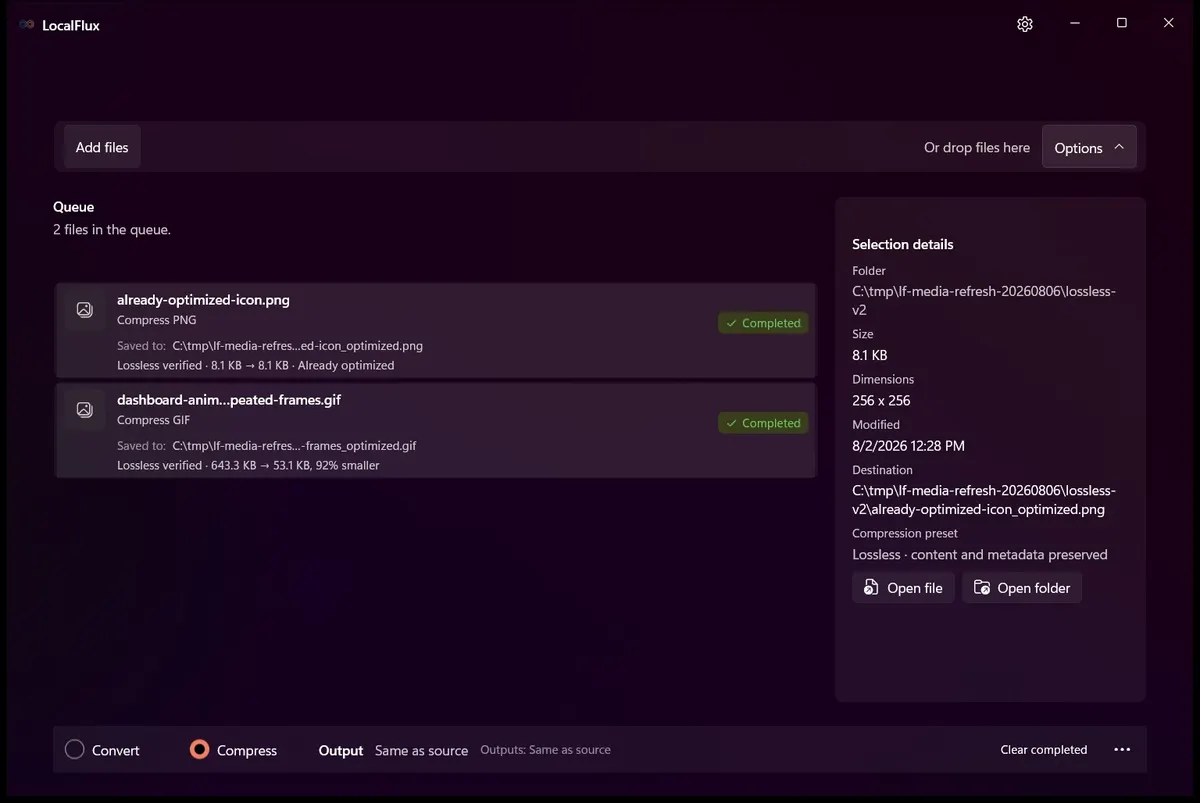
The output was not merely the same displayed size. Its exact size was 8,290 bytes, and its SHA-256 hash matched the source:
F287BBCE8EB98A9F19416DCE1A74A759F3AC8DDA69ADB338022CB1B8F90BD937
That result is valuable. A batch compressor should not claim dramatic savings where none exist, and it should not inflate a good source merely to produce a different file. In this case LocalFlux created the expected _compressed output while preserving the already-efficient bytes.
Treat “Already optimized” as a review outcome, not an error. The item completed successfully; there was simply no smaller verified candidate worth replacing it with.
Were the originals preserved?
Yes. The batch folder contained the original names and new sibling outputs such as:
garden-detail.jpgandgarden-detail_compressed.jpgdashboard-card.pnganddashboard-card_compressed.pngarchitecture.webpandarchitecture_compressed.webp
The 12 source files were hashed before review, and the source bytes remained available after the batch. LocalFlux wrote the new files rather than overwriting the originals.
That design makes comparison practical: open the original and output side by side, check important edges or texture at 100%, and keep the master if the derivative is intended only for delivery. You should still maintain a separate backup of irreplaceable work. “Creates a new file” is useful protection from an accidental overwrite, but it is not a backup strategy.
Mixed formats in Compress mode and the real one-format limitation
Here is the precise rule:
- In Compress mode, a mixed batch keeps each supported image’s current format. A JPG produces a JPG, a PNG produces a PNG, and a WebP produces a WebP.
- In Convert mode, one output format is selected for the active batch. If you choose WebP, the compatible files in that conversion batch are routed to WebP. You cannot choose JPG for one queued item and PNG for another within that same batch.
The one-output-format-per-batch limitation therefore belongs to Convert, not Compress.
This matters in practice. If your goal is simply “make these existing assets smaller,” use Compress and preserve the mixed formats. If your goal is “standardize everything as WebP,” use Convert and choose WebP once. If different subsets need different target formats, split them into separate conversion batches.
Watch the 15-second workflow
Video transcript: The Windows picker shows 12 synthetic inputs under C:\tmp. LocalFlux shows the mixed queue in Compress mode, the Balanced preset, active progress, the completed 12-file batch, and the already-optimized PNG result. The video is an edited sequence of real app states and is not a conversion-speed benchmark.
How to judge a batch before making it routine
Do not evaluate only the easiest file. Choose representatives that are likely to reveal problems:
- the most detailed photograph;
- a dark or gradient-heavy image;
- a graphic with small text or thin lines;
- an image with transparency, if your workflow uses it; and
- a file that was previously exported for the web.
Open those outputs at 100%. Look for halos around edges, banding in gradients, smearing in fine texture, changes around transparent pixels, and legibility of small labels. Then test one file in the destination: the website, content manager, store listing, email tool, or client portal where it will actually be used.
If the quality is right and the measured savings help, process the remaining folder with the same policy. If not, change the preset or divide the folder into groups with different needs.
Practical patterns for recurring work
Keep a stable intake folder
Use a predictable folder such as Incoming images, then move approved outputs into the project. Avoid compressing directly inside a complex archive until you know how your downstream tools treat the _compressed names.
Use one representative pilot batch
Ten to 20 files is large enough to expose variation and small enough to inspect. Record the preset, total size before and after, and any outliers. That becomes a defensible baseline for future batches.
Separate format conversion from size reduction
Compress when the existing formats are acceptable. Convert when the destination requires a specific format. Doing both conceptually at once makes it harder to understand whether a result changed because of the preset, the codec, or both.
Preserve masters
Use the compressed files as delivery copies. Keep camera originals, source illustrations, and lossless masters elsewhere. Recompressing a compressed derivative repeatedly can compound quality loss.
Review outliers, not just averages
A 44.5% total reduction sounds tidy, but the range in this test was 0% to 71.6%. Outliers tell you which assets deserve a separate rule.
Common questions
Can I add JPG, PNG, and WebP files together?
Yes. That exact mixed batch was tested here. In Compress mode, each file kept its source format.
Will every image become smaller?
No. An already-efficient file may have little or no safe headroom. LocalFlux marked the prepared 8,290-byte PNG as Already optimized and produced a byte-identical output.
Does LocalFlux replace my originals?
Not in this tested workflow. It created new _compressed files beside the sources. Keep separate backups for important work regardless.
Can each file use a different output format?
Compress mode does not need one chosen output format; it preserves each file’s current format. Convert mode uses one selected output format per batch. Split the queue when different conversion targets are required.
Does “without uploading” mean I can turn off the internet?
The conversion work runs locally and does not require sending the source files to a conversion server. Windows and the Microsoft Store may still use networking for installation, licensing, or updates. The claim here concerns the file-processing path, not every network activity on the PC.
How much space will my batch save?
Measure a representative sample. This test saved 44.5% overall, but individual results ranged from 0% to 71.6%. Your content and prior encoding will decide the result.
A repeatable no-upload checklist
Before the batch:
- work from backed-up masters;
- collect a representative sample;
- confirm Compress mode and Same as source;
- choose a preset intentionally; and
- remove accidental queue items.
After the batch:
- confirm every item reached a completed or understood state;
- compare total bytes and per-file outliers;
- inspect difficult images at 100%;
- test one output in its real destination;
- keep the sources; and
- move only approved delivery copies into production.
The result
The 12-file LocalFlux 1.0.7 test turned a 7,424,843-byte mixed JPG/PNG/WebP folder into 4,123,560 bytes of outputs without uploading the source images. The batch saved 3,301,283 bytes (44.5%), preserved the original files, kept each format in Compress mode, and handled an already-optimized PNG without pretending it had found savings.
That combination is what makes batching useful for recurring work: one queue, one policy, visible per-file outcomes, and new delivery copies you can inspect before they leave your PC.
Batch compress images locally with LocalFlux
Practical checks before and after conversion
The reliable workflow is to split unlike image types into sensible batches; preserve dimensions when needed and spot-check transparency, metadata, orientation, and outlier sizes. This matters because changing a file extension does not preserve every property of the source. Decide what the destination actually needs, keep the source as the master, and use a small representative file before processing a large batch.
Before you start
- Record the source format and the properties that matter to the destination.
- Choose settings for the intended viewer, editor, device, or upload system.
- Use a new output folder and keep collision-safe names.
- Open the result in the software that will actually receive it.
- Compare content, dimensions or duration, and any metadata you expected to keep or remove.
Review the output
A successful status only confirms that an output was written. It does not prove that every font, frame, channel, page, formula, profile, tag, or accessibility feature survived. For important work, inspect representative outputs and retain the original until the delivered copy has been accepted.