
How to Convert WMV to MP4 on Windows Without Uploading It
Convert WMV videos to widely compatible MP4 files locally on Windows 11, keep the originals, and understand codecs, quality, metadata, and batch conversion.
On this page
WMV files still turn up in old project folders, screen-recording archives, training libraries, and exports from Windows-era software. The file may play on your PC, yet fail when you attach it to a web form, move it to a phone, add it to a modern editor, or send it to someone using another platform. In that situation, MP4 is usually the practical delivery format.
You do not have to upload the video to a website to make that copy. With LocalFlux on Windows 11, you can add one or more .wmv files, select MP4, and convert them on the PC. The original WMV files stay in place and the new files are written beside them with names such as archive-clip_converted.mp4.
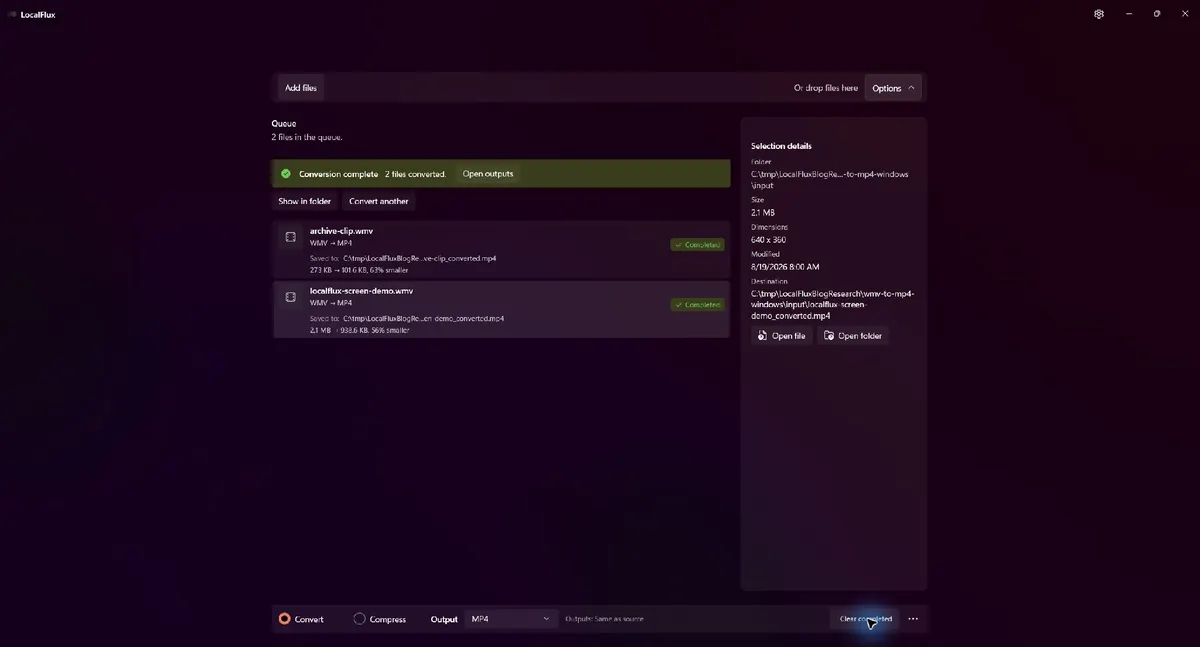
The tested LocalFlux 1.0.8 batch converted two neutral WMV fixtures under C:\tmp. The app reported reductions of 63% and 56% for these particular files; your result depends on the source.
Short answer: open LocalFlux, add the WMV files, choose Convert, set the output to MP4, leave the first run at the default settings, and select Convert. Play the new MP4 from beginning to end before archiving or sharing it.
Why convert WMV to MP4?
WMV and MP4 are containers. A container is the file structure that carries video, audio, timing information, and sometimes metadata. The extension alone does not tell the whole story: the streams inside the container determine whether a device or application can decode it.
The two WMV samples used for this guide contained WMV2 video and WMA2 audio. LocalFlux produced MP4 files containing H.264 video and AAC audio. That H.264/AAC combination is widely accepted by browsers, mobile devices, chat tools, learning systems, and video editors. It is a compatibility conversion, not merely a filename change.
Convert when:
- a site or application accepts MP4 but rejects WMV;
- a phone, tablet, TV, or editor cannot decode the old video;
- you want a consistent batch of deliverable files while keeping an untouched archive;
- you need a local workflow for confidential recordings or unreleased material.
Do not convert simply because MP4 sounds newer. If the destination already plays the WMV correctly, conversion adds processing time and another lossy encoding generation. Keep the original as the master either way.
The tested offline workflow
This walkthrough was tested on Windows 11 with the packaged x64 build of LocalFlux 1.0.8.0. The working directory was C:\tmp\LocalFluxBlogResearch\wmv-to-mp4-windows\input. The samples were synthetic, contained no personal information, and were short enough to inspect completely.
The app used bundled workers on the local computer. No browser upload, account, or cloud conversion was part of the test. This is editorial evidence for the workflow, not a clean-VM release qualification claim.
1. Put the WMV files in a neutral working folder
For a repeatable job, first copy the source files into a dedicated folder such as:
C:\tmp\VideoConversion\inputWorking from a copy is not required by LocalFlux—the app keeps the source unchanged—but it makes review and cleanup simpler. It also prevents you from confusing deliverables with the only copy of an archive.
Before conversion, note the number of files, their approximate durations, and whether each has sound. If a source is already damaged, a converter cannot recreate missing frames or audio.
2. Add one file or a whole batch
Open LocalFlux and choose Browse files, or drag the files into the intake area. Multiple compatible files can share one queue.
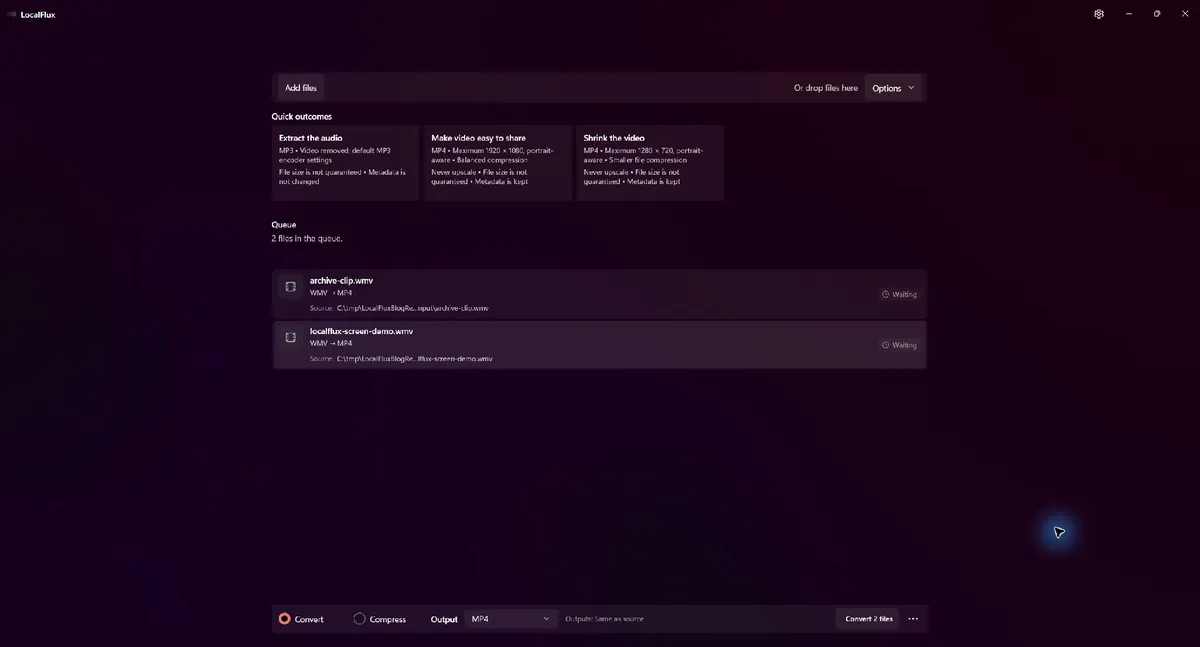
Both files are queued as WMV → MP4. Only neutral names and a C:\tmp path appear in the capture.
Check every row before continuing. A row should say WMV → MP4, not Compress, and the output summary should point to the intended location. In the tested configuration, outputs were saved beside the source.
3. Confirm MP4 and review the options
Select Convert and choose MP4 as the output. This matters because compressing a WMV and converting it to MP4 are different jobs: conversion changes the format and streams for compatibility, while compression focuses on size.
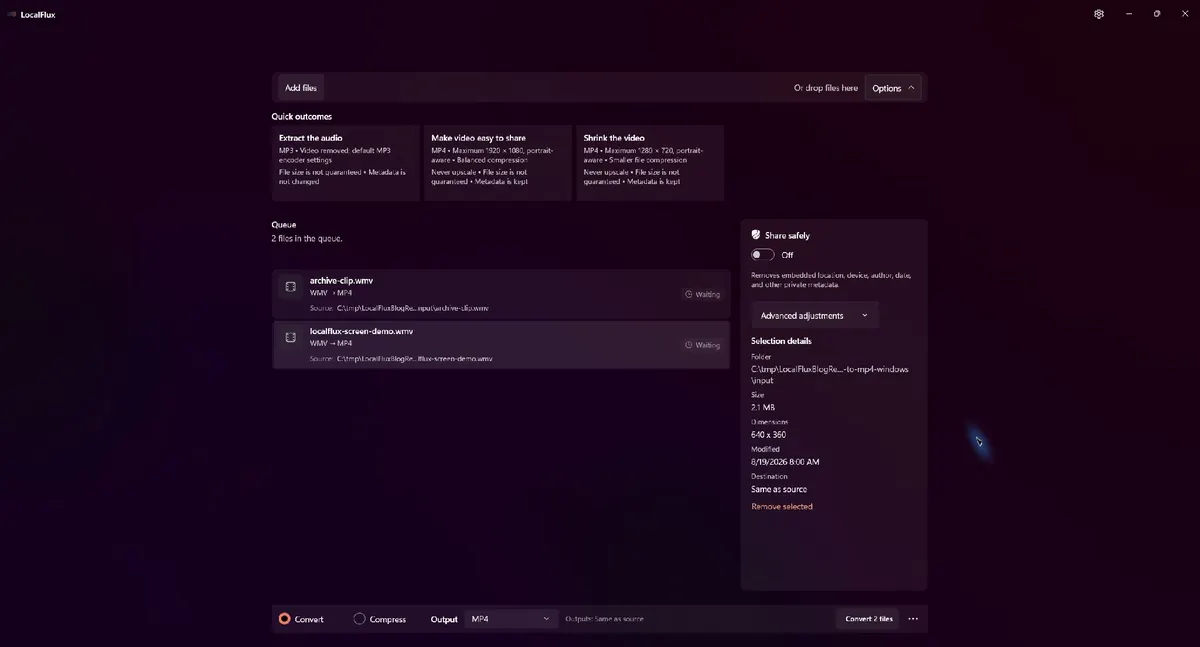
The options panel keeps the privacy control visible before the job starts.
For the first pass, keep original dimensions and the default compression setting. Changing several variables at once makes it difficult to understand why an output looks different. If the first result is too large or too soft, make a second copy with one adjustment and compare them.
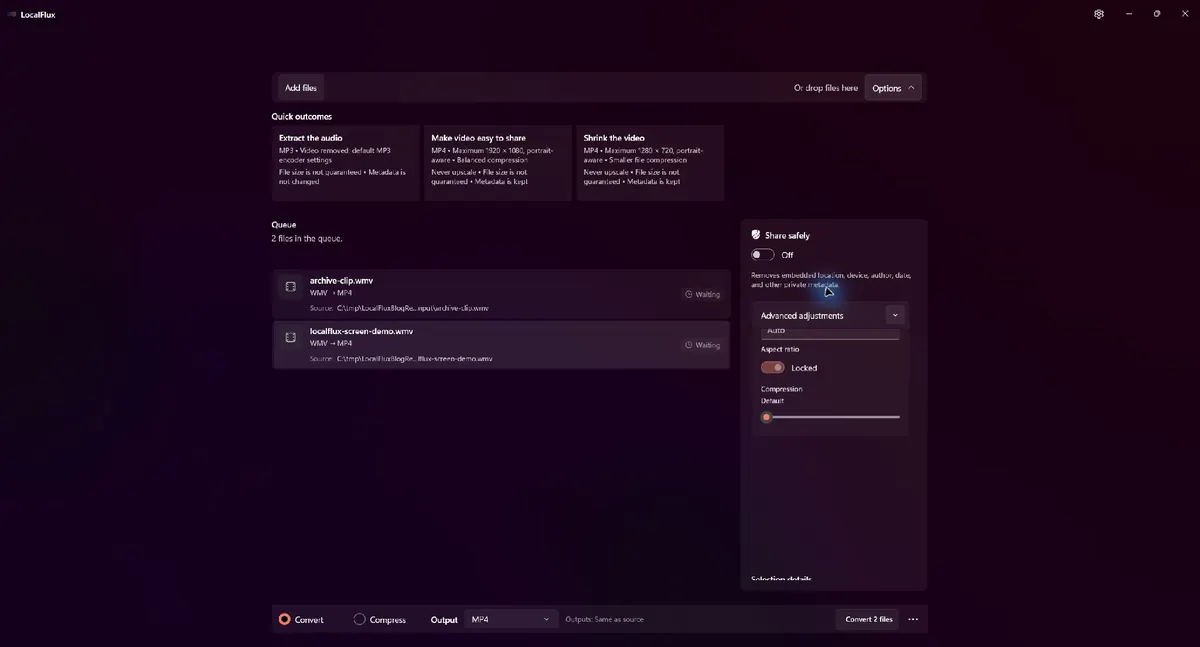
The tested job used the default adjustment rather than a maximum-compression preset.
4. Decide whether you need metadata removal
Local conversion and metadata removal are separate questions. Keeping a file on the PC prevents an upload during conversion, but the output can still carry metadata derived from the source or added by the encoder.
If the file is staying in your own archive, ordinary conversion may be appropriate. If it is leaving your control, review the Share safely option and inspect the finished file. Metadata handling varies by format, and removal does not anonymize visible faces, names spoken in audio, account names shown on screen, or confidential content inside the video.
5. Start the batch and let the queue finish
Select Convert 2 files (or the count shown for your batch). LocalFlux processes the queue one item at a time and displays progress.
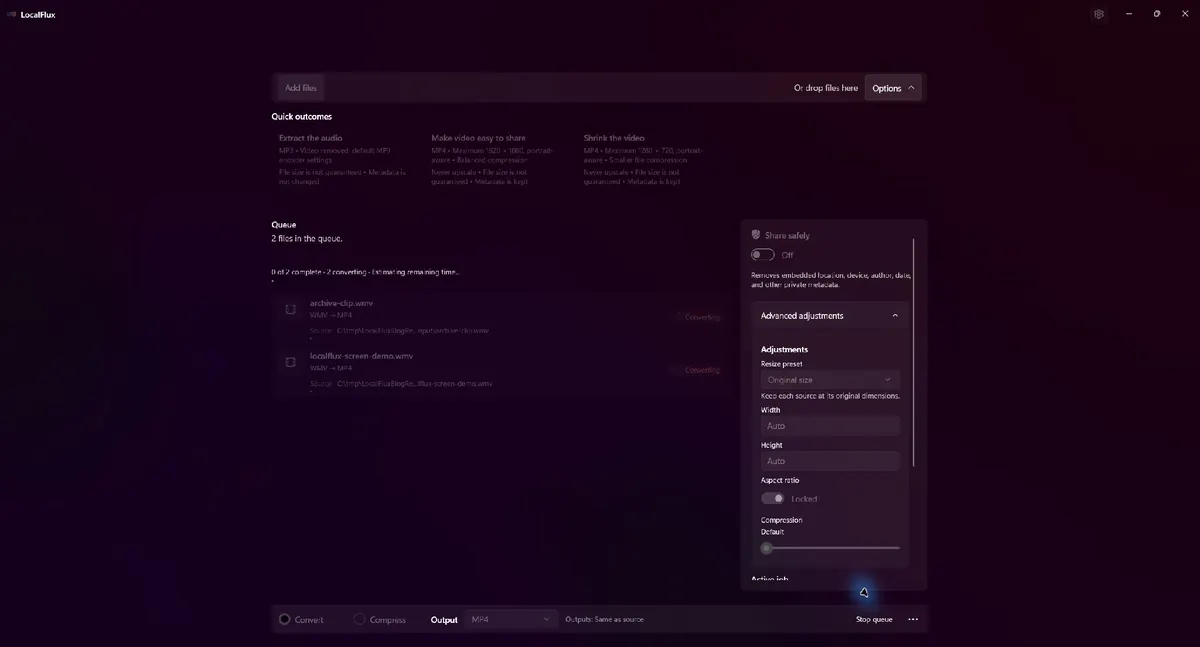
The queue view shows which item is converting and which items are waiting.
Avoid renaming, moving, or deleting the sources while conversion is running. Video conversion can be CPU- or GPU-intensive; laptops may complete the job more consistently while connected to power.
6. Open and verify the MP4 files
Do not treat a green completion banner as the final quality check. Play each MP4 and inspect:
- the first and last ten seconds;
- at least two points in the middle;
- lip sync or screen-action sync;
- audio on the left and right channels where applicable;
- the expected width, height, and orientation;
- titles, captions, and fine text for compression artifacts.
For important recordings, watch the whole file. A successful container write does not prove that every source frame was healthy.
What happened in the measured test?
The test deliberately used two different sources: a 320 × 240 mono archive-style clip and a 640 × 360 stereo screen-demo clip.
| Source | Source streams | Output streams | Duration: source → output | Size: source → output |
|---|---|---|---|---|
archive-clip.wmv | WMV2 video, WMA2 mono audio at 44.1 kHz | H.264 video, AAC mono audio at 44.1 kHz | 9.092 s → 9.015 s | 279,579 B → 104,040 B |
localflux-screen-demo.wmv | WMV2 video, WMA2 stereo audio at 48 kHz | H.264 video, AAC stereo audio at 48 kHz | 12.086 s → 12.041 s | 2,167,593 B → 961,170 B |
Both outputs retained their source dimensions. The small duration differences are normal container/encoder timing differences in these samples. They do not establish a universal tolerance for every video; review your own material.
The size reductions are examples, not promises. A lightly compressed source can shrink substantially when encoded to H.264. A source that is already efficient may barely shrink or can become larger. Resolution, motion, noise, frame rate, source bitrate, and the selected compression level all affect the result.
Will converting WMV to MP4 reduce quality?
Usually, yes, at least technically. In this tested route, the video was decoded and encoded as H.264 and the audio was encoded as AAC. That is lossy transcoding. A good result can look and sound effectively unchanged at normal viewing size, but it is not bit-for-bit lossless.
To limit avoidable quality loss:
- keep the original dimensions unless the destination requires smaller video;
- begin with the default setting rather than maximum compression;
- avoid converting the new MP4 repeatedly;
- keep the WMV master for future exports;
- compare fine text, gradients, rapid motion, and noisy footage closely.
If you expect more editing, edit from the best available master and create MP4 as a delivery copy at the end.
Common problems and fixes
The MP4 has no sound
First confirm that the WMV actually contains an audio stream and plays with sound before conversion. Then try another local player. If the source uses an unusual or protected WMA variant, it may not match the WMA2 route tested here.
The video looks softer
Check whether you resized it or chose stronger compression. Return to original dimensions and the default setting, then compare a still frame at 100% zoom. Remember that another conversion cannot restore detail lost in a previous encode.
The output is larger than the WMV
That is possible. File size depends on encoding settings and source complexity, not the extension alone. If compatibility is the goal, a larger output may still be valid. If size is the goal too, make a second test with moderately stronger compression and inspect the result.
The colors or brightness look different
Old video can use color-range or interlacing conventions that modern players interpret differently. Compare the same frame in more than one player. If the source is interlaced or uses a specialized broadcast workflow, use a tool that exposes explicit deinterlacing and color-management controls.
Conversion fails immediately
Confirm that the file is a real WMV rather than a different format with a renamed extension. Copy it to a simple local path such as C:\tmp\VideoConversion\input, make sure it is not still syncing or downloading, and verify that it plays. Then retry one file by itself.
Offline conversion and privacy
“Offline” is useful because the media does not have to be sent to a third-party conversion service. That reduces exposure to upload logs, retention policies, account tracking, and accidental selection of the wrong file. It does not remove every privacy risk.
Before sharing, look for:
- names, faces, addresses, notifications, or account identifiers visible in the frames;
- spoken private information in the audio;
- metadata you do not want to retain;
- unintended footage before or after the useful segment;
- sensitive filenames or folder names in screenshots of your workflow.
This guide’s captures use synthetic media, neutral filenames, and C:\tmp; no Downloads list, username, or personal content is shown.
WMV-to-MP4 checklist
Before you start:
- keep or back up the original WMV;
- confirm the source plays and contains the expected audio;
- use a short, neutral local working path;
- identify the destination’s resolution or upload limits.
Before you deliver:
- verify the MP4 opens in the target app or device;
- check duration, dimensions, audio channels, sync, and visual quality;
- inspect metadata when the file will leave your control;
- retain the WMV master until the recipient accepts the result.
The practical takeaway
For ordinary WMV2/WMA2 files, LocalFlux provides a straightforward local route to H.264/AAC MP4 on Windows 11: add the files, select MP4, keep conservative defaults, convert, and review the results. The workflow creates new copies and leaves the originals available.
The most important part is not the click sequence. It is treating MP4 as a delivery copy, testing it in the destination that matters, and keeping the source until the job is truly complete.
Check LocalFlux’s currently supported routes or compare this workflow with the MOV-to-MP4 guide.
Publication evidence
This guide uses neutral, rights-cleared fixtures tested with LocalFlux 1.0.8.0 x64 on Windows 11. The source files, outputs, measurements, package details, and privacy review are retained with the article:
- Test record
- Measurements
- Privacy and rights review
- Media manifest with SHA-256 hashes
- Source and fixture notes
Practical checks before and after conversion
The reliable workflow is to inspect legacy video and audio codecs, interlacing, aspect ratio, frame rate, subtitle handling, and audio sync; MP4 is a container, not a guarantee of playback. This matters because changing a file extension does not preserve every property of the source. Decide what the destination actually needs, keep the source as the master, and use a small representative file before processing a large batch.
Before you start
- Record the source format and the properties that matter to the destination.
- Choose settings for the intended viewer, editor, device, or upload system.
- Use a new output folder and keep collision-safe names.
- Open the result in the software that will actually receive it.
- Compare content, dimensions or duration, and any metadata you expected to keep or remove.
Review the output
A successful status only confirms that an output was written. It does not prove that every font, frame, channel, page, formula, profile, tag, or accessibility feature survived. For important work, inspect representative outputs and retain the original until the delivered copy has been accepted.