
How to Convert PNG to JPG on Windows Without Uploading It
Convert PNG files to JPG locally on Windows 11, keep the originals, and understand transparency, metadata, quality, and file-size tradeoffs.
On this page
- Quick answer
- When JPG is the right output
- Step 1: Add the PNG files
- Step 2: Check the output and defaults
- Step 3: Decide what should happen to transparency
- Step 4: Convert and inspect the copies
- Tested results
- Conversion does not automatically remove metadata
- Batch PNG-to-JPG conversion
- Other Windows options
- Important limitations
- Frequently asked questions
- Create the JPG copy and keep the PNG
- Publication evidence
PNG is a strong format for screenshots, diagrams, logos, and images that need transparency. But some websites, document systems, printers, and older applications accept only JPG. The practical solution is to create a compatible JPG copy while keeping the PNG original.
With LocalFlux on Windows 11, add one or more PNG files, choose Convert, select JPG, and start the conversion. Processing runs on your PC. LocalFlux leaves the sources unchanged and saves each result as a new file such as garden-photo_converted.jpg.
Use JPG when: the destination requires it or you need a widely compatible copy of an opaque photograph.
Keep PNG when: the image needs transparency, contains crisp interface text or fine lines, or is still a master you expect to edit.
Quick answer
- Open LocalFlux on Windows 11.
- Add one or more
.pngfiles. - Choose Convert, not Compress.
- Select JPG as the output.
- Start with Original size and Quality: Default.
- Select Convert.
- Open the new
_converted.jpgfiles and inspect them before use.
Get LocalFlux from the Microsoft Store or review the supported formats before starting.
When JPG is the right output
PNG and JPG solve different problems. PNG uses lossless compression and supports an alpha channel. It suits interface captures, diagrams, flat graphics, and logos with transparent areas. JPG uses lossy compression, has broad compatibility, and is usually a more practical delivery format for opaque photographs.
| Image or destination | Better choice | Why |
|---|---|---|
| Opaque photograph for a site, form, printer, or older app | JPG | Broad support and often fewer bytes for photographic detail |
| Logo, icon, cutout, or graphic that needs transparency | PNG or WebP | JPG has no alpha channel |
| UI screenshot with small text or sharp one-pixel edges | PNG | Lossless storage avoids JPEG ringing and softening |
| Modern web asset where WebP is supported | WebP | Efficient delivery with optional transparency |
| Source you may edit again | Keep the PNG | Repeated JPG saves add lossy re-encoding |
If the goal is modern web delivery rather than JPG compatibility, use the PNG-to-WebP guide.
Step 1: Add the PNG files
Drag PNG files onto LocalFlux or choose Add files. The queue identifies every route as PNG → JPG and shows the source location before anything is written.
This tested batch uses three rights-cleared fixtures: a 1440 × 960 photo-like PNG, a 1320 × 940 LocalFlux interface screenshot, and a 2048 × 2048 LocalFlux logo with transparent pixels. The working files use the neutral C:\tmp\LocalFluxPngToJpgBlog path, so no Windows account name or personal folder appears.
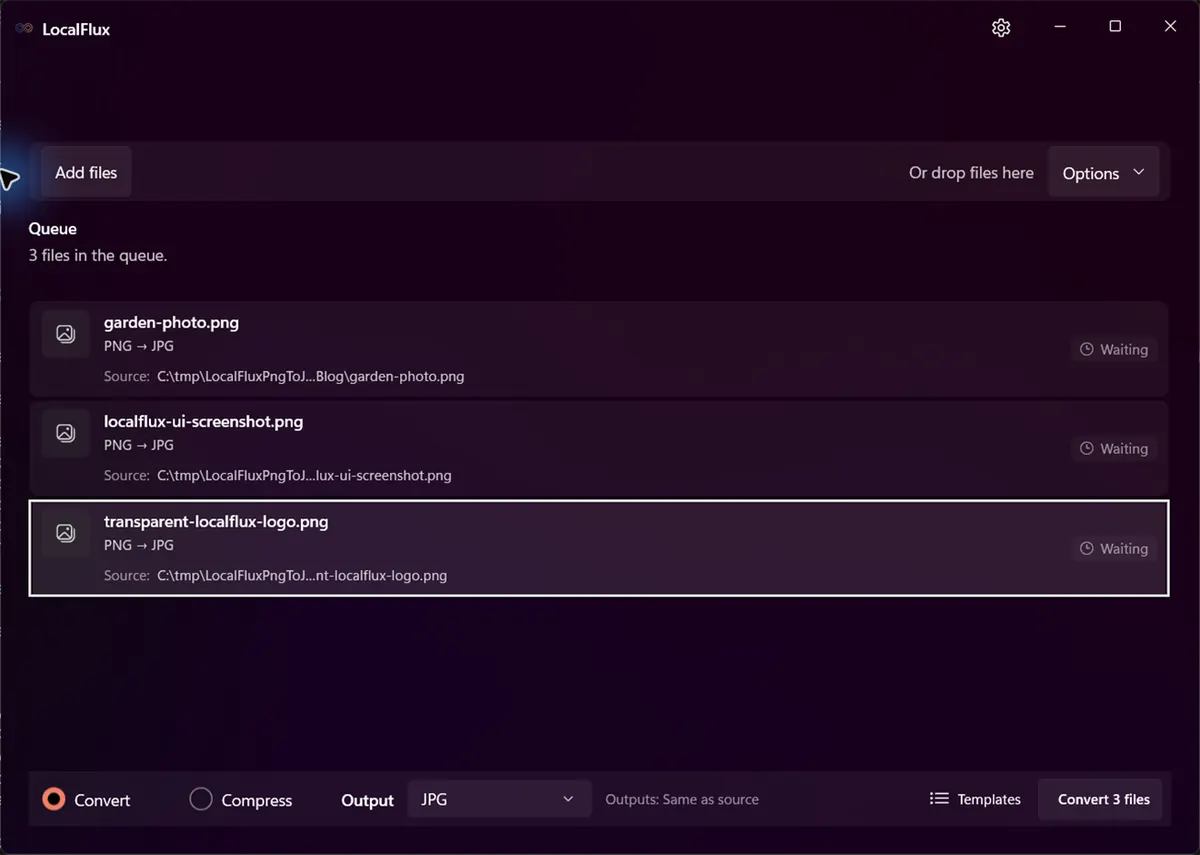
All three rows are ready, JPG is selected once for the batch, and outputs will be saved beside their sources.
Step 2: Check the output and defaults
Choose JPG in the output menu. One batch uses one output format, so create separate batches when files need different destinations.
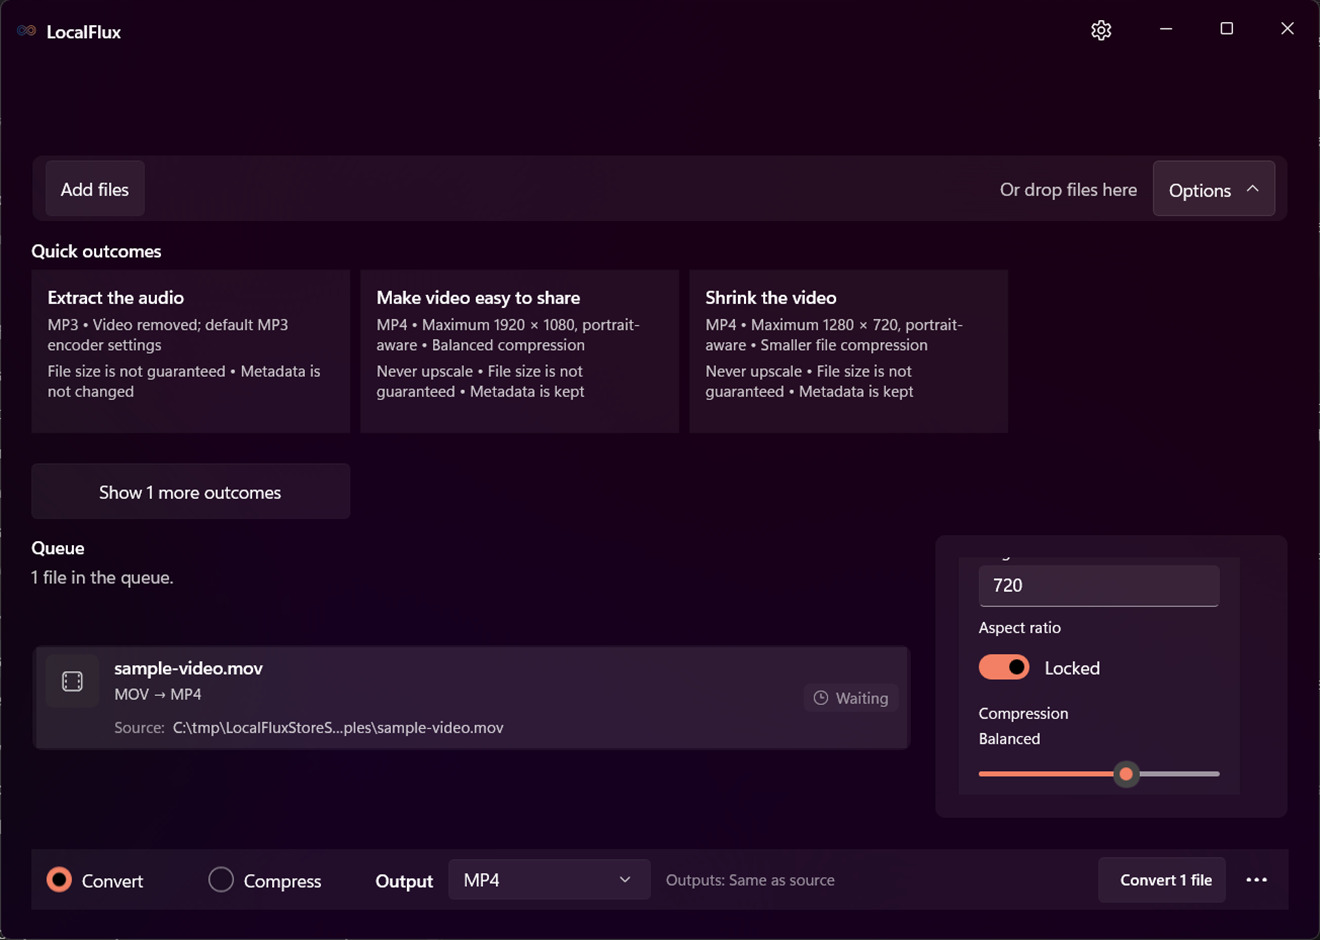
Open Options before the first run. In LocalFlux 1.0.7, the tested defaults were:
- Share safely: Off;
- Resize preset: Original size;
- width and height: Auto;
- aspect ratio: Locked; and
- quality: Default.
Those settings are a sensible first pass. They retain each image’s pixel dimensions and let you judge a representative result before reducing quality. If the destination specifies a maximum width or height, resize once during conversion. If you need a smaller JPG, lower quality gradually and compare detailed areas at 100%.
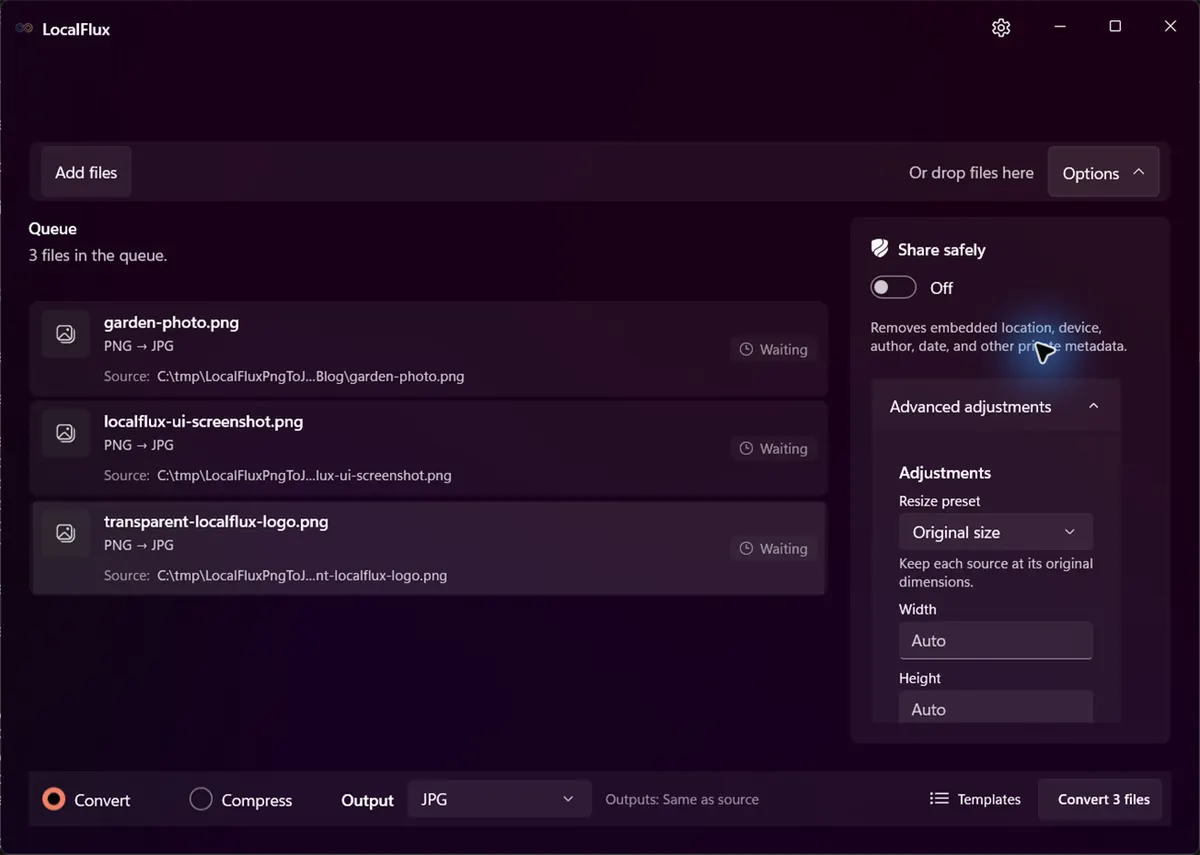
Ordinary conversion and metadata removal are separate choices. Share safely was off in this test.
Step 3: Decide what should happen to transparency
This is the most important limitation: JPG cannot represent transparent pixels.
In this test, the transparent logo became an opaque JPG with black wherever the PNG was fully transparent. The source corner measured srgba(0,0,0,0); the output corner measured srgb(0,0,0). That result is usable only when black is an acceptable background.
If you need a white, brand-colored, or patterned background, composite the PNG onto that background before conversion. If transparency must remain, keep PNG or choose a destination-supported format such as WebP.
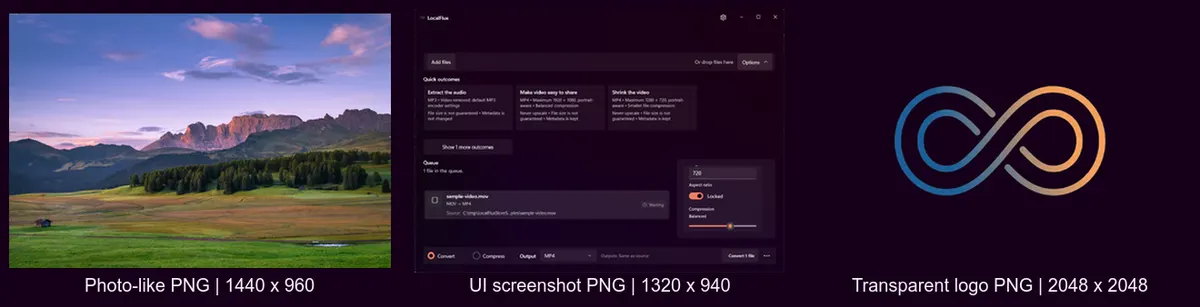
The test set covers photographic detail, crisp interface content, and an alpha-channel edge case.
Step 4: Convert and inspect the copies
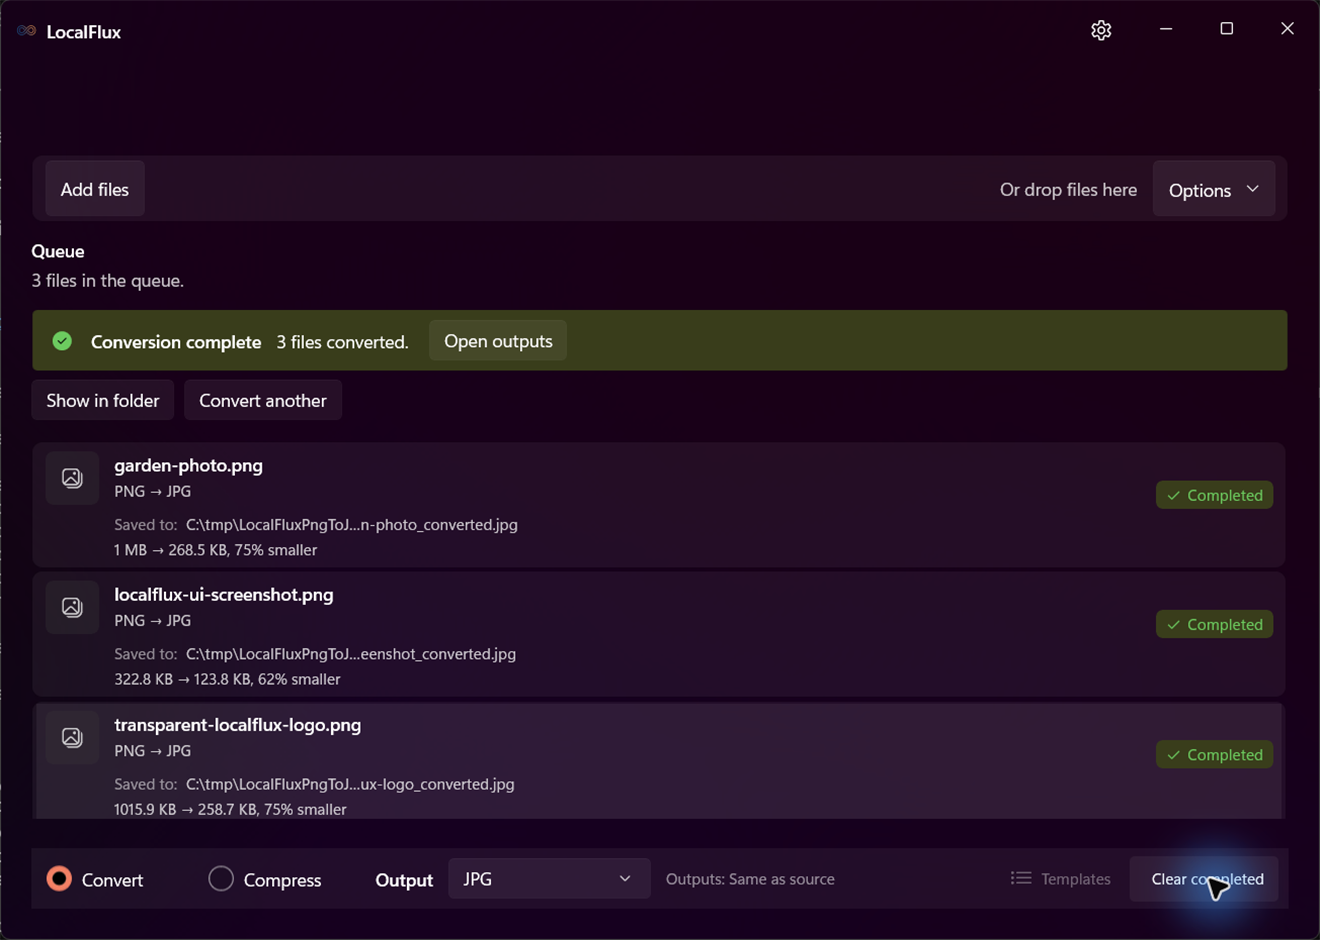
Select Convert 3 files. LocalFlux writes a new file for each completed row rather than replacing the source. This run produced:
garden-photo_converted.jpg;localflux-ui-screenshot_converted.jpg; andtransparent-localflux-logo_converted.jpg.
Open important results in the application that will consume them. Look for color shifts, softened text, ringing around hard edges, unexpected orientation, and the background used for formerly transparent pixels.
Tested results
All three outputs were valid JPEG files, retained their source dimensions, and were smaller than their PNG inputs in this fixture set.
| Fixture | Source PNG | Output JPG | LocalFlux result | Dimensions | Transparency result |
|---|---|---|---|---|---|
| Photo-like image | 1,097,855 bytes | 274,913 bytes | 75% smaller | 1440 × 960 | Source was already opaque |
| LocalFlux UI screenshot | 330,551 bytes | 126,755 bytes | 62% smaller | 1320 × 940 | Output became fully opaque |
| Transparent LocalFlux logo | 1,040,291 bytes | 264,900 bytes | 75% smaller | 2048 × 2048 | Transparent pixels became black |
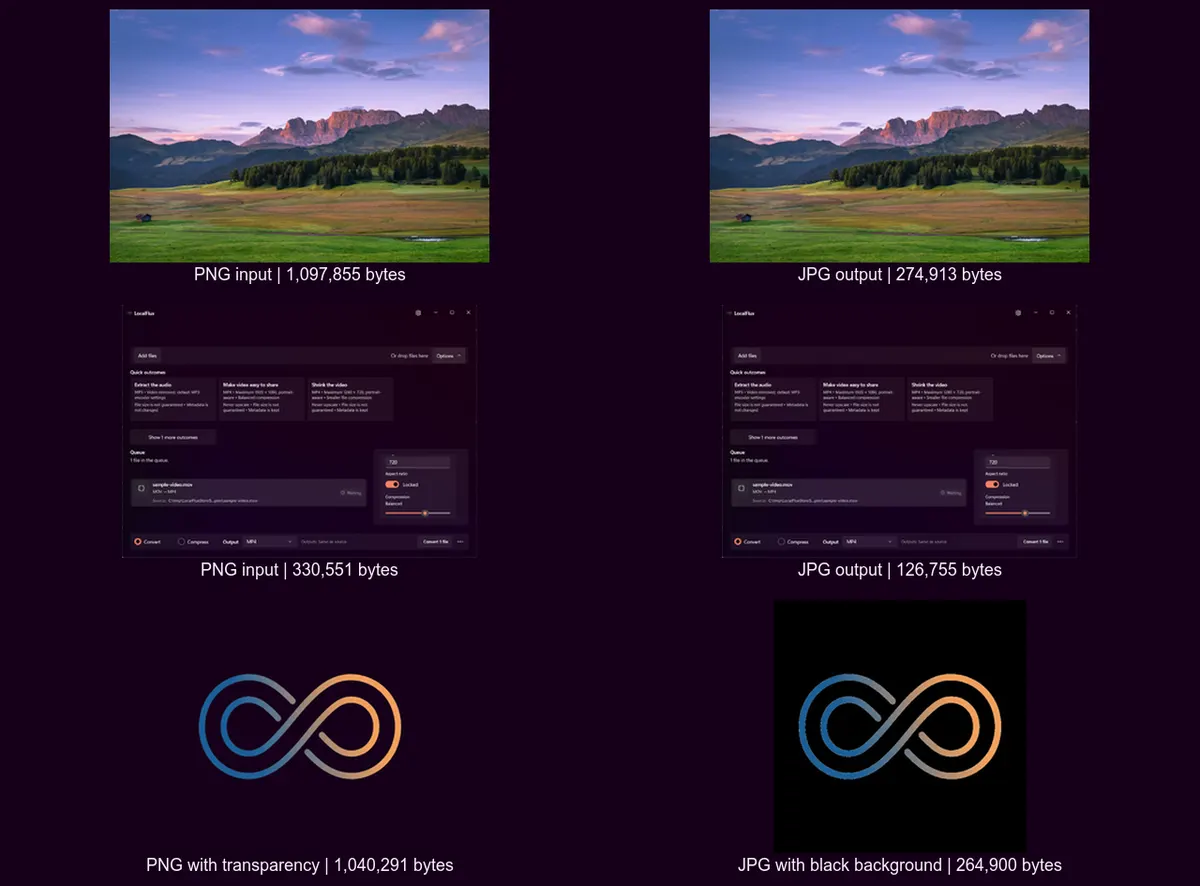
The photograph changes little at this display size. The logo makes the irreversible alpha-to-black change clear.
You can inspect the exact photo PNG and photo JPG, UI PNG and UI JPG, and transparent logo PNG and opaque logo JPG.
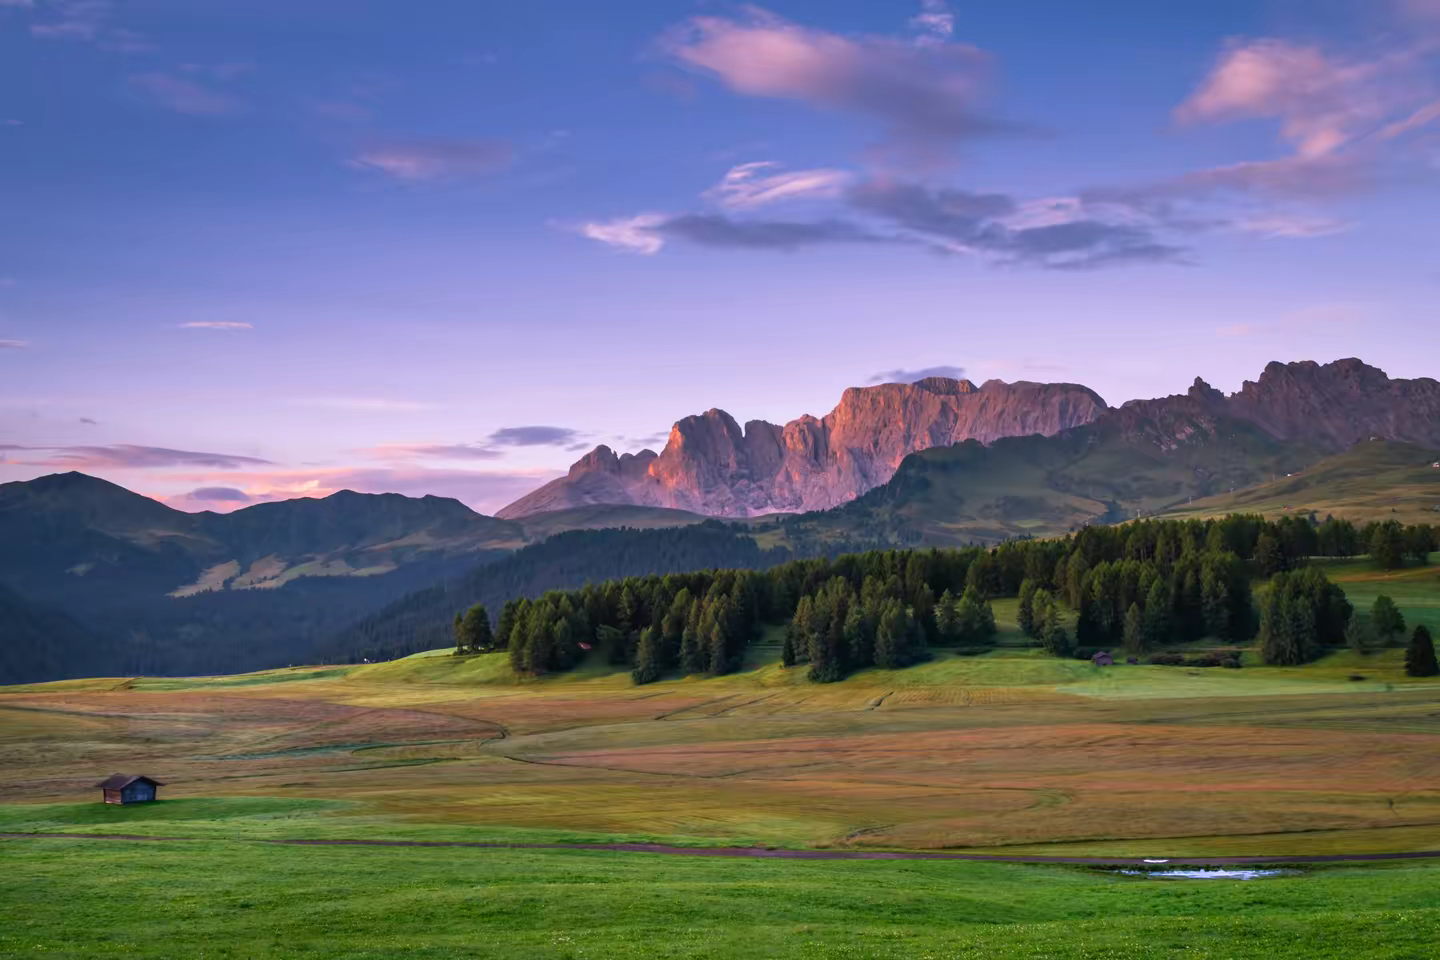
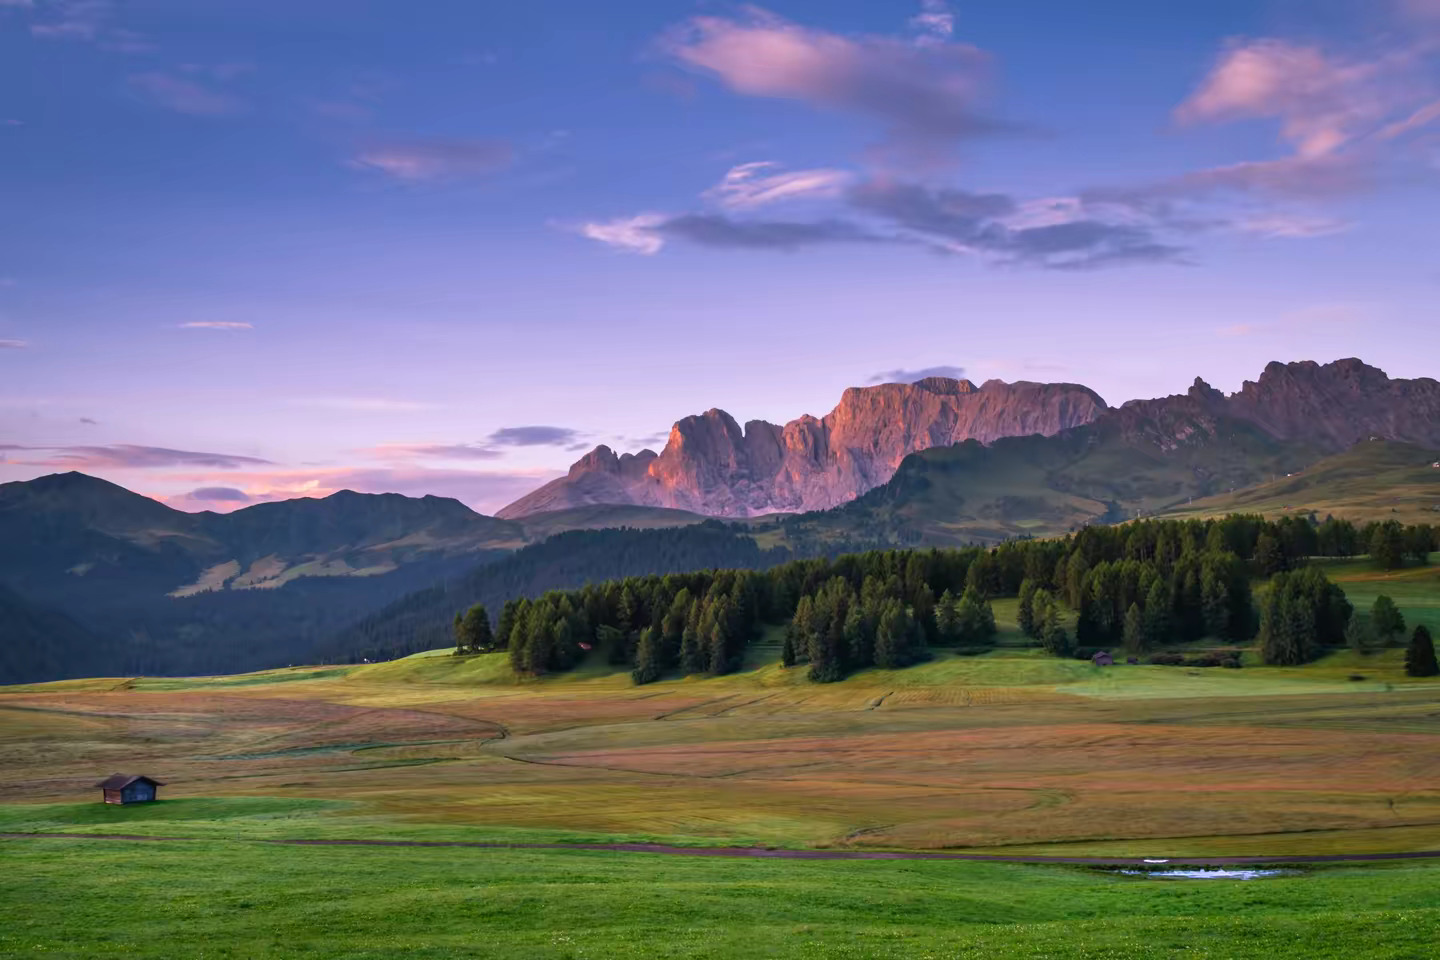
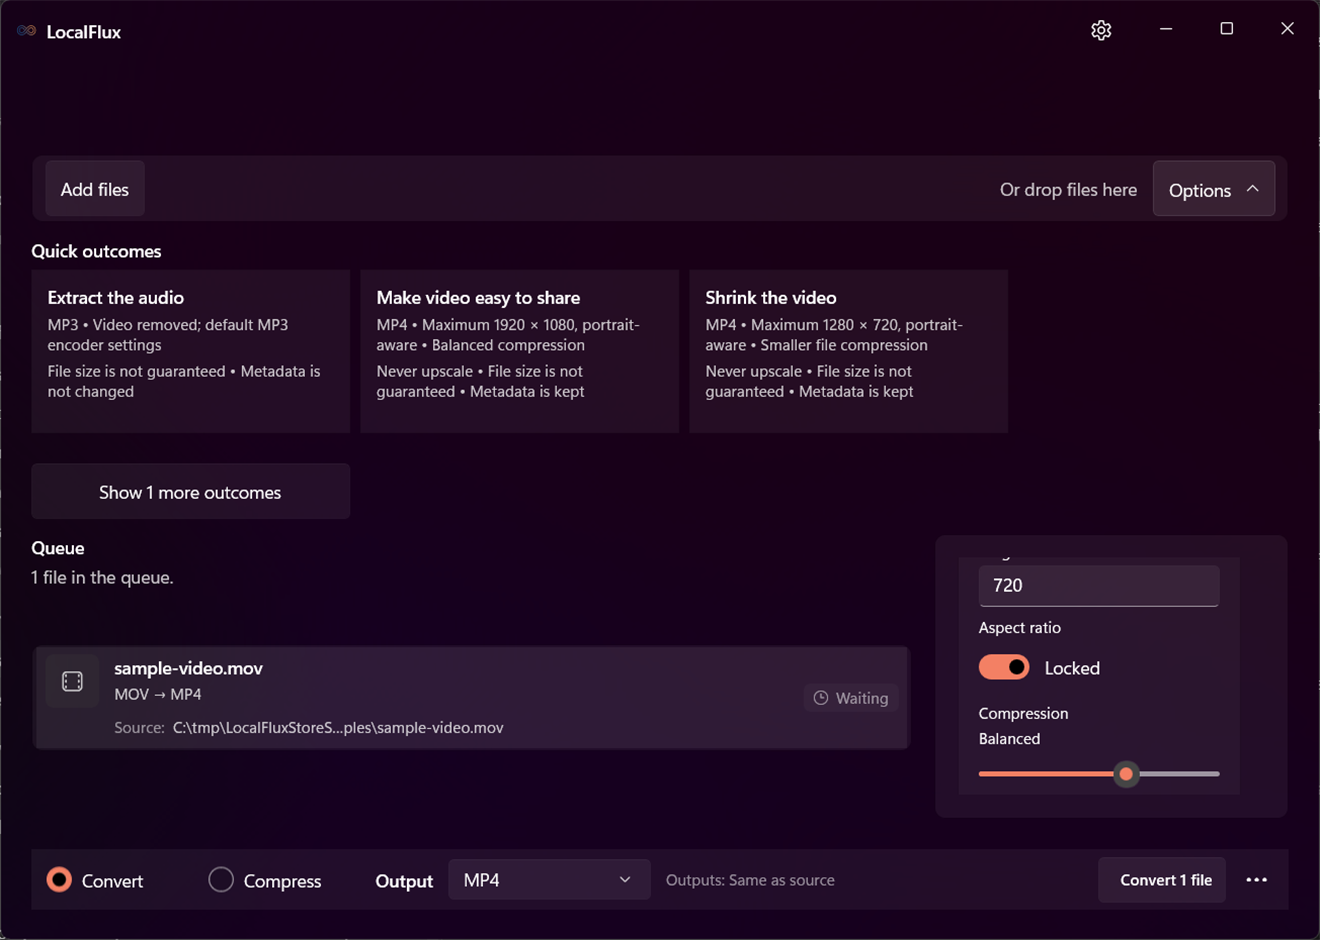


These measurements describe this test, not a universal compression promise. Content, dimensions, encoder settings, metadata, and prior optimization all affect size. If reducing bytes is the main goal, test representative images and use the batch image compression workflow.
The bundled inspection tool reported quality 92 for the JPG outputs. The LocalFlux interface deliberately labels that setting Default, so the durable advice is to begin with Default and inspect the result, not to treat one numeric value as a promise across encoders or future versions.
Conversion does not automatically remove metadata
Changing PNG to JPG is not the same as sanitizing the file.
The photo-like PNG in this test contained an EXIF profile, and the ordinary JPG conversion also contained an EXIF profile. The other two fixtures had no embedded profile before or after conversion. Ordinary conversion therefore did not establish metadata removal.
If location, device, author, or date metadata matters, use LocalFlux’s supported Share safely workflow and verify the sanitized copy. The guide Does photo conversion remove EXIF metadata? explains the difference between format conversion and privacy cleanup.
Batch PNG-to-JPG conversion
For a larger compatible set:
- Add a small representative group first.
- Choose JPG once for the batch.
- Keep the original dimensions for the first run.
- Inspect a photograph, a sharp graphic, and every image with transparency.
- Only then process the rest of the folder.
LocalFlux handles each ready row individually and creates a separately named output. Review failed or unsupported items on their own; a .png extension does not guarantee a healthy PNG file.
Other Windows options
- Paint or another trusted editor: convenient for one non-sensitive image when you can use Save as or Export.
- A command-line image tool: efficient for scripted workflows when its color, metadata, transparency, and overwrite behavior are understood.
- An online converter: workable for non-sensitive material if you accept its upload, retention, account, and jurisdiction terms.
- Keep PNG: correct when the destination already accepts it or the image depends on transparency and lossless edges.
Local conversion reduces the parties and systems involved. It does not replace your organization’s access-control, retention, backup, or review requirements.
Important limitations
JPG uses lossy compression. Small text, thin lines, and high-contrast edges can show artifacts even when a photograph looks fine. Prefer one conversion at a suitable quality over repeatedly opening and saving the JPG.
Color can depend on the source profile, encoder, viewer, and display. This test established valid output format, dimensions, opacity, profile presence, naming, and hashes; it was not a color-managed publishing certification.
Do not delete the PNG merely because the JPG opens. Keep the source until the destination accepts the copy and any required review or retention period has passed.
Frequently asked questions
Is JPG the same as JPEG?
For everyday use, .jpg and .jpeg refer to the same image format family. LocalFlux writes the tested outputs with the .jpg extension.
Will converting PNG to JPG always make the file smaller?
No. All three test files became smaller, but results depend on image content, dimensions, quality, metadata, and PNG encoding.
What happens to a transparent PNG?
JPG cannot store alpha transparency. In the tested default conversion, fully transparent pixels became black. Composite the image onto the background you want first, or retain PNG or WebP when transparency is required.
Does the conversion resize the image?
Not with Original size selected. All three tested JPGs retained their source dimensions.
Does PNG-to-JPG remove EXIF metadata?
Do not assume it does. The tested photo-like input and output both contained an EXIF profile. Use a supported metadata-removal workflow and verify the exact result.
Are the PNG originals overwritten?
No in this tested workflow. LocalFlux created _converted.jpg copies, and post-conversion SHA-256 checks confirmed that all three source hashes were unchanged.
Create the JPG copy and keep the PNG
The safe everyday pattern is simple: keep the PNG, create the JPG required by the destination, and inspect the copy before relying on it. Choose a background deliberately for transparent artwork, and treat metadata removal as a separate verified step.
Get LocalFlux from the Microsoft Store or review the supported formats.
Publication evidence
The screenshots and samples are rights-cleared and privacy-reviewed. The package includes the exact test record, measurements, privacy review, and SHA-256 media manifest.