
How to Convert TIFF to JPG on Windows Without Uploading
On this page
- When JPG is the right output
- What this guide tested
- Step-by-step: single-image TIFF to JPG
- Measured single-image results
- Transparency has to become opaque
- Why multi-page TIFF needs special care
- Quality and repeated conversion
- DPI versus pixel dimensions
- Common problems
- Privacy and sensitive scans
- Final checklist
- The practical takeaway
- Publication evidence
- Practical checks before and after conversion
TIFF is a strong format for scans, archival images, print workflows, and lossless or high-bit-depth masters. It is less convenient when a website, form, messaging app, presentation, or ordinary photo viewer expects JPG. A local conversion creates a smaller, broadly compatible delivery copy without sending the image to an online service.
With LocalFlux on Windows 11, add one or more single-image .tiff files, choose JPG, and convert them on the computer. The TIFF sources remain unchanged and the JPG files are written beside them with names such as color-scan_converted.jpg.
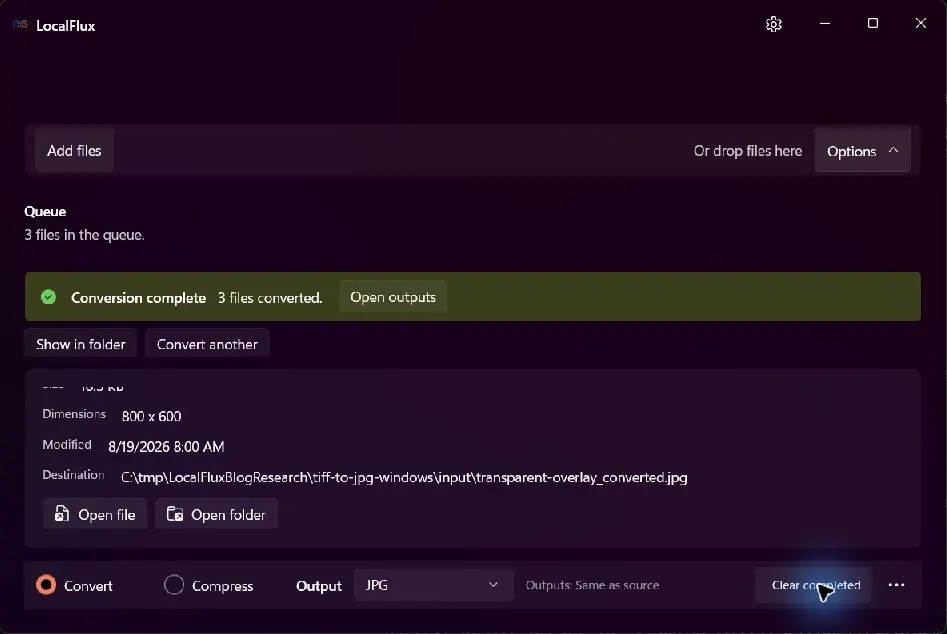
The tested LocalFlux 1.0.8 batch converted a color scan, grayscale scan, and transparent image under C:\tmp. A separate two-page TIFF test failed in the app, so multi-page files need a different workflow.
Quick steps for a single-image TIFF: open LocalFlux, add the TIFF files, select Convert, choose JPG, keep original dimensions and default quality for the first run, convert, and compare each JPG with its source.
When JPG is the right output
Choose JPG when the destination requires a common, compact, opaque image:
- uploading a scan to a site that rejects TIFF;
- inserting an image into a presentation or document;
- sending a preview that does not need archival fidelity;
- creating a broadly viewable derivative while retaining the TIFF master.
Keep TIFF when you need layers/pages, high bit depth, lossless re-editing, transparency, specialized color data, or a preservation master. JPG uses lossy compression, supports only an opaque result, and typically stores 8-bit samples. It is a delivery format, not a replacement for an archival TIFF.
What this guide tested
The workflow was exercised with the packaged x64 LocalFlux 1.0.8.0 build and four synthetic fixtures:
- 1200 × 800 color TIFF, 16-bit, 300 DPI;
- 1000 × 1400 grayscale TIFF, 16-bit, 300 DPI;
- 800 × 600 TIFF with alpha transparency, 16-bit, 96 DPI;
- a two-page TIFF combining the color and grayscale pages.
The three single-image files completed. They retained pixel dimensions and DPI metadata while becoming 8-bit JPG. Alpha transparency was removed, as JPG cannot carry it. The two-page TIFF caused LocalFlux to report: “The image conversion finished without producing the expected output.”
That measured boundary is important. Do not send a multi-page TIFF through this route assuming that all pages will be delivered as one JPG or a complete set.
Step-by-step: single-image TIFF to JPG
1. Make a working copy
The test used:
C:\tmp\LocalFluxBlogResearch\tiff-to-jpg-windows\inputCopy important scans to a working directory first. LocalFlux preserves originals, but keeping an authoritative archive separate from delivery work reduces accidental replacement or cleanup mistakes.
Identify whether each TIFF contains one page or several. Windows thumbnails may show only the first page. Use an image inspector or document-aware viewer if the source came from a scanner, fax system, or records archive.
Also note the source dimensions, orientation, DPI, color mode, bit depth, transparency, and embedded profiles when those properties matter.
2. Add the single-image TIFF files
Open LocalFlux and use Browse files, or drag the files into the intake area. The tested batch contained three files with different color/alpha characteristics.
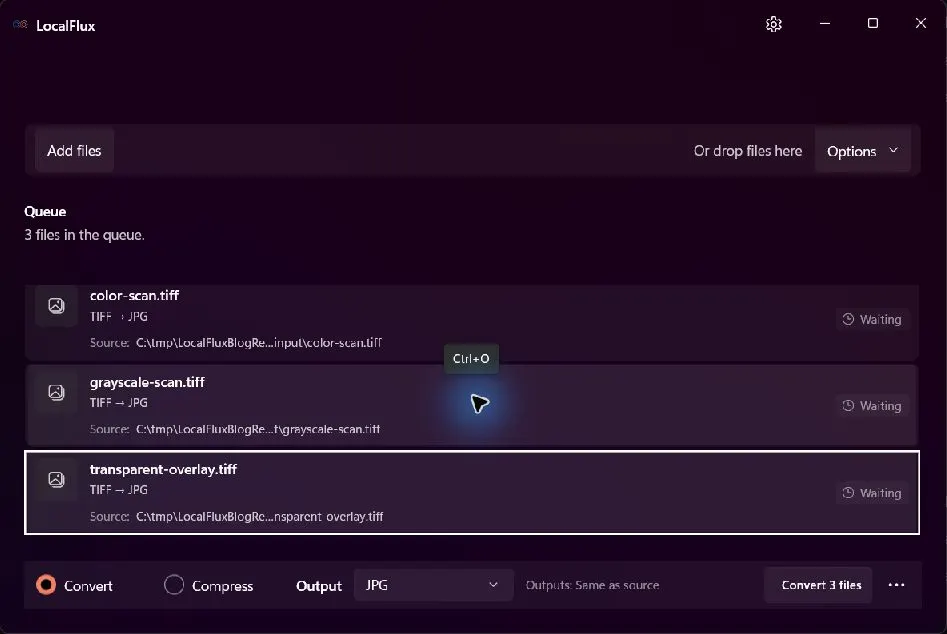
The queue shows TIFF → JPG for each neutral fixture. No user profile or personal image appears.
Check that every row shows TIFF → JPG and that Convert—not Compress—is selected.
3. Review privacy and image options
Expand Options. The Share safely control is off during ordinary conversion.
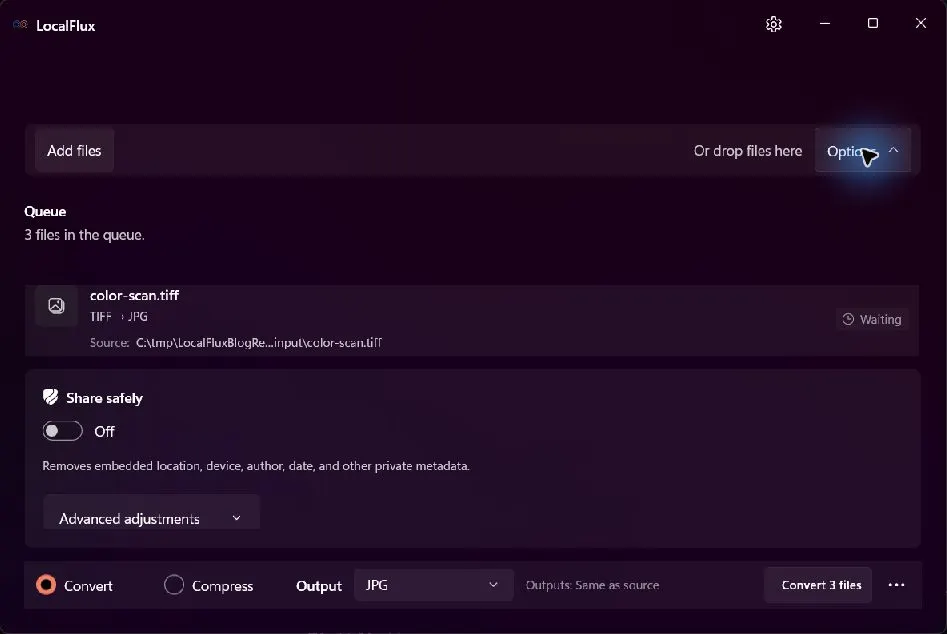
Local processing avoids an upload, while metadata removal is a separate choice.
If the image will leave your control, decide whether embedded device, author, date, or location metadata should remain. Share safely can help remove supported metadata, but it cannot hide text printed in the scan, a face in the image, a signature, a case number, or other visible content.
Open Advanced adjustments to review resize and quality controls.
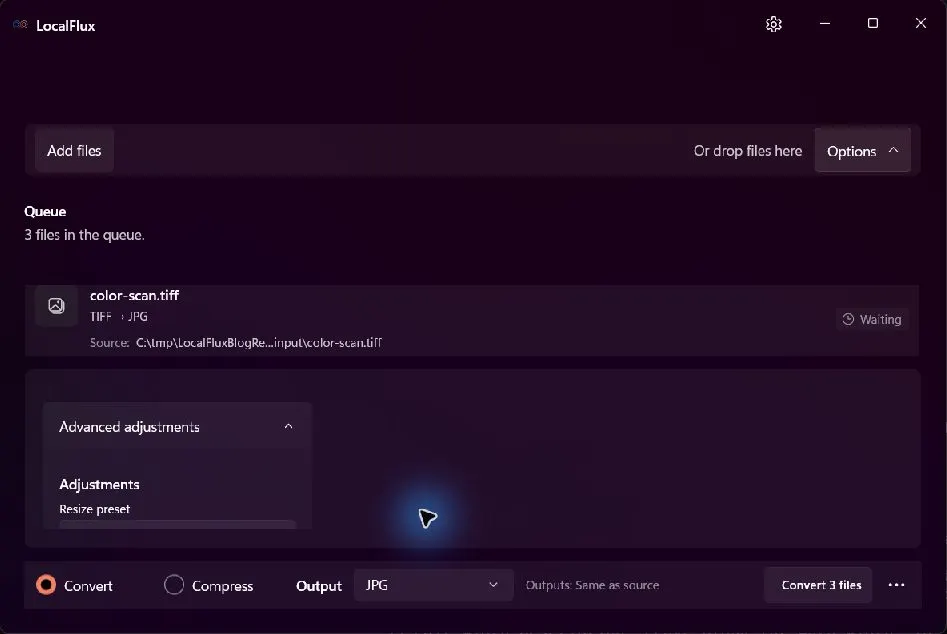
The tested first pass kept the original dimensions, locked aspect ratio, and default quality.
For archival derivatives, avoid resizing until the destination requires it. A smaller JPG cannot restore discarded pixels later. Change one variable per test so you can attribute any quality difference.
4. Convert the batch
Select Convert 3 files. Image conversion can finish quickly for small sources. Wait for the completion banner and use the output paths to pair every JPG with its TIFF.
5. Compare source and output
Open the TIFF and JPG side by side at 100% zoom. Inspect:
- small text and thin lines;
- gradients and flat-color areas for JPEG blocks or ringing;
- shadows and highlights;
- color neutrality in grayscale scans;
- the background where transparency existed;
- width, height, orientation, and DPI;
- metadata and color profiles required by the destination.
For documents, verify legibility across every edge and stamp. For photographs, inspect detailed textures and high-contrast edges.
Measured single-image results
| Source | Source properties | JPG output | Size: source → output |
|---|---|---|---|
color-scan.tiff | 1200 × 800, 16-bit sRGB with alpha channel, 300 DPI | 1200 × 800, 8-bit sRGB, opaque, 300 DPI | 45,748 B → 44,996 B |
grayscale-scan.tiff | 1000 × 1400, 16-bit grayscale with alpha channel, 300 DPI | 1000 × 1400, 8-bit grayscale, opaque, 300 DPI | 20,264 B → 19,988 B |
transparent-overlay.tiff | 800 × 600, 16-bit sRGB with alpha, 96 DPI | 800 × 600, 8-bit sRGB, opaque, 96 DPI | 18,698 B → 18,546 B |
The outputs were only 1–2% smaller in these deliberately simple fixtures. Real scanned TIFFs can shrink far more, but a TIFF can already use effective lossless compression. File size depends on pixel count, bit depth, TIFF compression, visual complexity, and selected JPG quality. Do not promise a percentage based on the extension.
The conversion reduced bit depth from 16 to 8 bits per sample and removed alpha. That is expected for ordinary JPG delivery, but it is one reason to keep the TIFF.
Transparency has to become opaque
TIFF can store an alpha channel; JPG cannot. During conversion, transparent and partially transparent pixels must be composited against a background. The exact background is part of the output behavior and may not suit your design.
Before converting a logo, overlay, signature cutout, or product image, decide what should appear behind it. If you need transparency, use PNG or WebP instead of JPG. If you need a white background, flatten a copy against white in an image editor before conversion and inspect edge halos.
Semi-transparent antialiasing can reveal dark or light fringes when composited against an unexpected color. Check the edges at 100–200% zoom.
Why multi-page TIFF needs special care
A TIFF can contain several images or pages. JPG represents one image per file. Therefore a multi-page conversion needs an explicit policy: export the first page only, create one numbered JPG per page, or use a multi-page destination such as PDF.
LocalFlux accepted the two-page fixture into a TIFF → JPG queue:
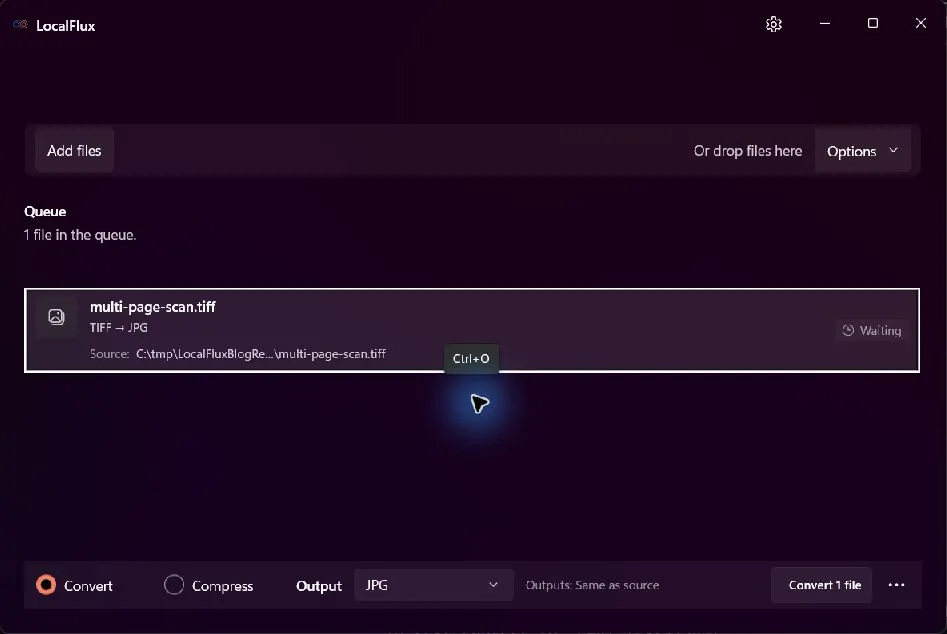
The file appears as a normal TIFF queue item before conversion.
The bundled image worker produced two hidden staging JPGs, one matching each page, but the app expected a single staged output and marked the job failed:
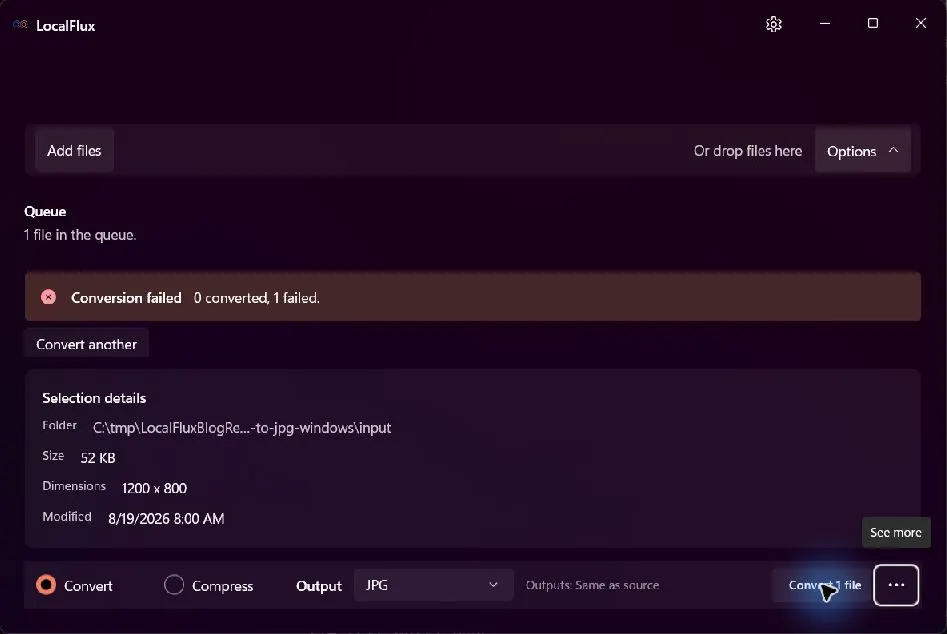
Observed message: “The image conversion finished without producing the expected output.” The app reported 0 converted and 1 failed.
This is a failure from the user’s perspective even though page-like staging artifacts existed. Do not rely on hidden temporary filenames as deliverables; they include an internal identifier and are not presented as completed outputs.
For a multi-page TIFF:
- determine the exact page count;
- choose whether you need separate JPGs or one document;
- use a page-aware tool to export numbered images, or convert to PDF if preserving document order is the goal;
- verify that every page exists, is correctly oriented, and has a stable filename;
- keep the TIFF master.
Quality and repeated conversion
JPG is lossy. Even at a high quality setting, pixel values change. Re-saving a JPG repeatedly adds generation loss, especially around text, line art, and high-contrast edges.
For the best practical result:
- convert from the original TIFF, not a prior JPG;
- retain original pixel dimensions for the first pass;
- use default or conservative quality;
- avoid editing and re-exporting the JPG multiple times;
- create a new derivative from TIFF whenever requirements change.
If exact pixel preservation matters, choose PNG or another lossless format. If the recipient needs a visually faithful print asset, confirm color-profile and print requirements instead of assuming JPG is sufficient.
DPI versus pixel dimensions
DPI metadata describes an intended physical scale; pixel dimensions describe actual image detail. A 1200 × 800 image remains 1200 × 800 regardless of whether its metadata says 96 or 300 DPI. Applications can use DPI to calculate print size, but websites typically care about pixels.
The tested outputs retained 300 DPI for the color/grayscale fixtures and 96 DPI for the transparency fixture. Always verify this when a printer or records system depends on physical-size metadata. Also confirm that the output has not been resized unintentionally.
Common problems
The JPG background changed
The source likely contained transparency. JPG must be opaque. Flatten a copy against the desired background or choose PNG/WebP.
Text looks fuzzy or has halos
Return to original size and a higher quality setting. For black-and-white documents, a lossless or document-specific format may preserve edges better than JPG.
The file is not much smaller
The TIFF may already use LZW or ZIP compression, or the JPG quality may be conservative. Decide whether compatibility alone solves the problem. If size matters, test a second quality level and compare legibility.
Colors differ
Check embedded color profiles, bit depth, and the viewing applications. JPG delivery workflows often simplify high-bit-depth or specialized TIFF color information. Use a color-managed tool for print-critical assets.
Only the first page is visible—or the conversion fails
Treat the source as a document, not a single image. Count pages with a TIFF-aware tool and export them deliberately. The tested two-page file failed in LocalFlux 1.0.8 and should not be included in a blind batch.
Privacy and sensitive scans
Scans often contain more sensitive information than ordinary photos: names, signatures, addresses, identifiers, medical data, contracts, barcodes, or handwritten notes. Offline conversion prevents an upload to a conversion website, but the new JPG remains sensitive.
Store working copies in an approved location, restrict access, and review visible content as well as metadata. Cropping or metadata removal does not redact the image. Proper redaction must permanently remove information from pixels and be verified in the delivered file.
This guide uses generated images and a neutral C:\tmp directory. Its screenshots contain no real documents, user folders, or personal information.
Final checklist
Before conversion:
- determine whether each TIFF has one page or several;
- preserve the TIFF master;
- note dimensions, DPI, bit depth, transparency, and color requirements;
- decide whether metadata should be kept or removed.
After conversion:
- compare dimensions, orientation, DPI, color mode, and background;
- inspect fine text and edges at 100% zoom;
- verify every expected page or output file;
- test the JPG in the destination;
- keep the TIFF until delivery is accepted.
The practical takeaway
LocalFlux provides a straightforward offline route for single-image TIFF files: select JPG, keep conservative defaults, convert, and compare the derivatives with the masters. In the measured test, dimensions and DPI were retained, while bit depth and alpha were reduced to what JPG supports.
Multi-page TIFF is the boundary to remember. The two-page test failed in the app and did not produce a normal completed output, so use a page-aware workflow for those files. Check LocalFlux’s supported formats or compare the image tradeoffs in the PNG-to-JPG guide.
Publication evidence
This guide uses generated TIFF fixtures tested with LocalFlux 1.0.8.0 x64 on Windows 11. The single-image results, failed multi-page test, measurements, package details, and privacy review are retained with the article:
- Test record
- Measurements
- Privacy and rights review
- Media manifest with SHA-256 hashes
- Source and fixture notes
Practical checks before and after conversion
The reliable workflow is to determine whether TIFF is multi-page, high bit depth, CMYK, alpha-bearing, or archival; JPG may flatten and discard information, so inspect every intended page. This matters because changing a file extension does not preserve every property of the source. Decide what the destination actually needs, keep the source as the master, and use a small representative file before processing a large batch.
Before you start
- Record the source format and the properties that matter to the destination.
- Choose settings for the intended viewer, editor, device, or upload system.
- Use a new output folder and keep collision-safe names.
- Open the result in the software that will actually receive it.
- Compare content, dimensions or duration, and any metadata you expected to keep or remove.
Review the output
A successful status only confirms that an output was written. It does not prove that every font, frame, channel, page, formula, profile, tag, or accessibility feature survived. For important work, inspect representative outputs and retain the original until the delivered copy has been accepted.